Happy New week friends! I hope you had a great weekend.
Our weekend was spent playing soccer both on Saturday and Sunday,
which left very little time for anything else.
Luckily both days were beautiful and being outside in the autumn breeze felt great.
There are days when I feel I need a course in time
management as there’s always something to do.
Blogging is a lot of work and effort and I
often end up wondering how others get everything blog related done and still manage to keep their laundry all folded and put away, meals cooked, floors mopped etc.
The honest truth is that I would rather watch a movie with
my family than edit photos for a blog post.
Even if I fall asleep while the movie is on,
which might or might not happen 85% of the time.:)
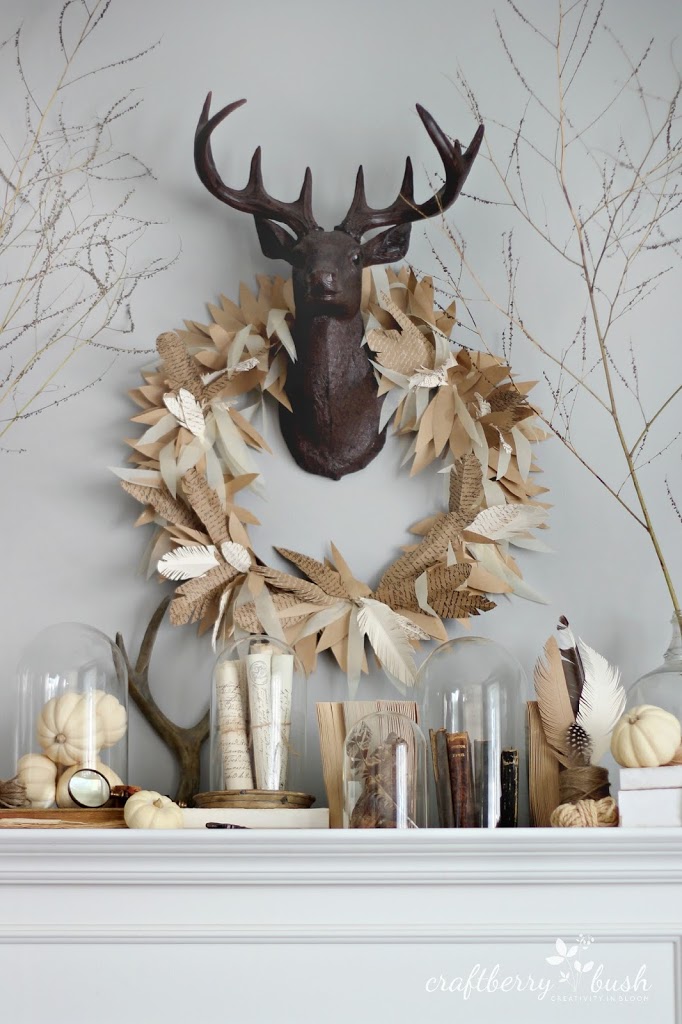
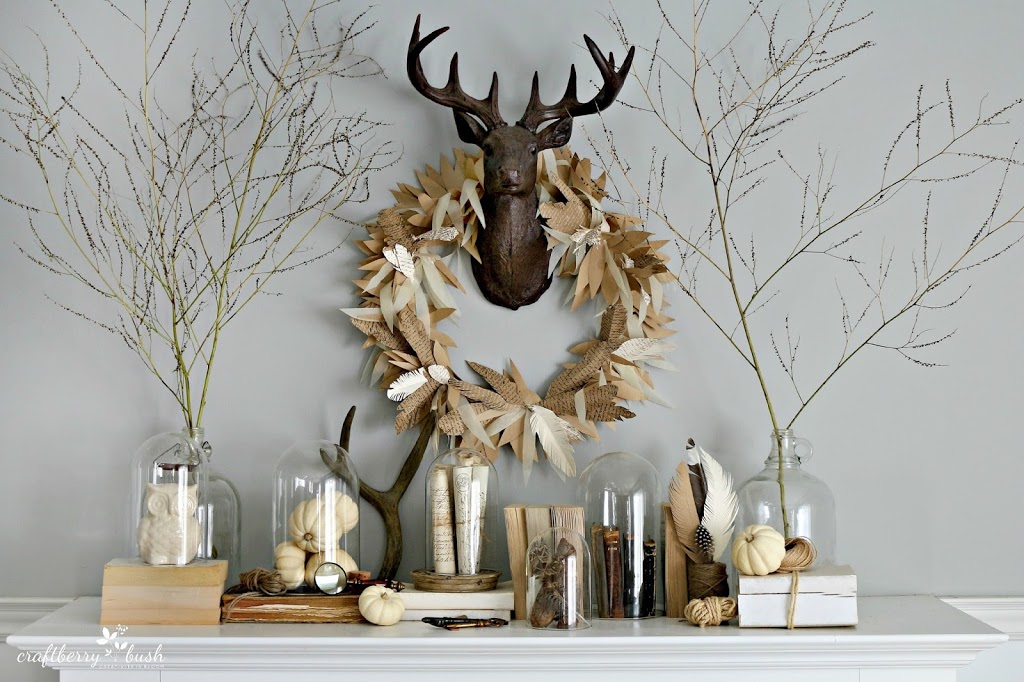
Last week I shared this year’s fall mantel and since then,
I have gotten requests on a tutorial for the wreath and the paper feathers.
Though I wasn’t intending to do one, I did take pictures along the way, as I often do.
So here we go….
You will need:
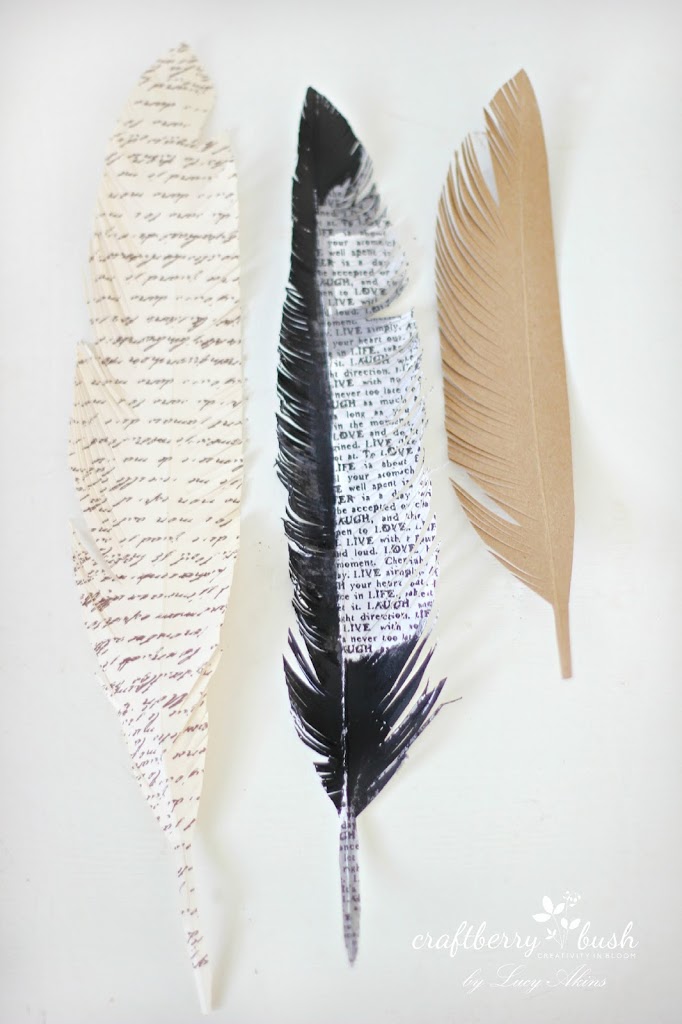
Thick paper or cardstock. This one is by my friends at Canvas Corp, they have such an amazing selection of paper to choose from. I chose this newspaper printed paper.
Scissors
Paint (optional)
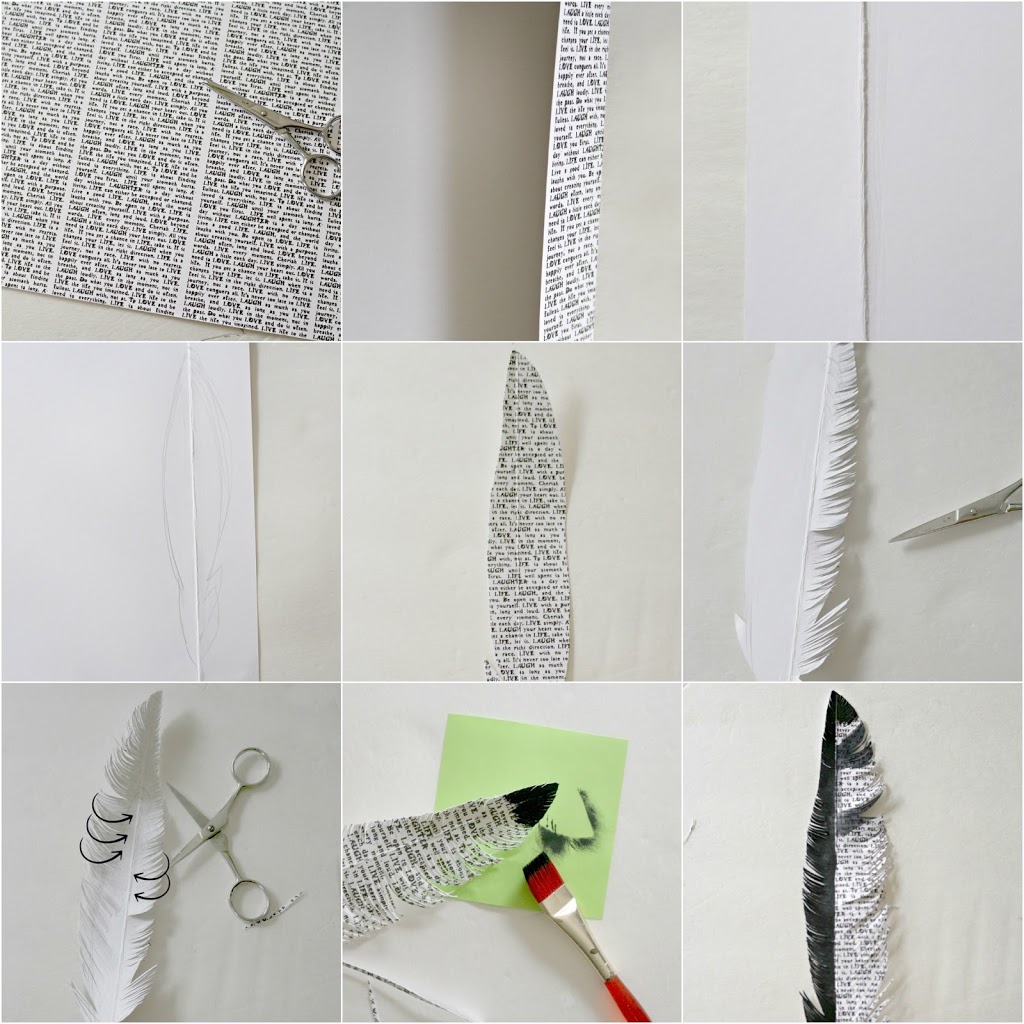
Fold paper vertically making sure you press down firmly on the fold.
You want to create a very defined crease.
Fold paper the opposite way, following the same fold line and again pressing firmly on the fold. The fold will create the vein of the feather.
Sketch out a feather shape around the fold or the ‘vein’ of the feather as shown.
Cut the feather shape out.
With small scissors cut very thin slits at either side towards the ‘vein’
I find that if I cut the feather in a sweeping ie. curving manner, they tend to look more realistic.
Optional: Paint feather with desired paint color.
To make the wreath you will need :
Brown paper
Thick paper or cardstock
Tissue paper (by Canvas Corp)
Hot glue
large embroidery hoop
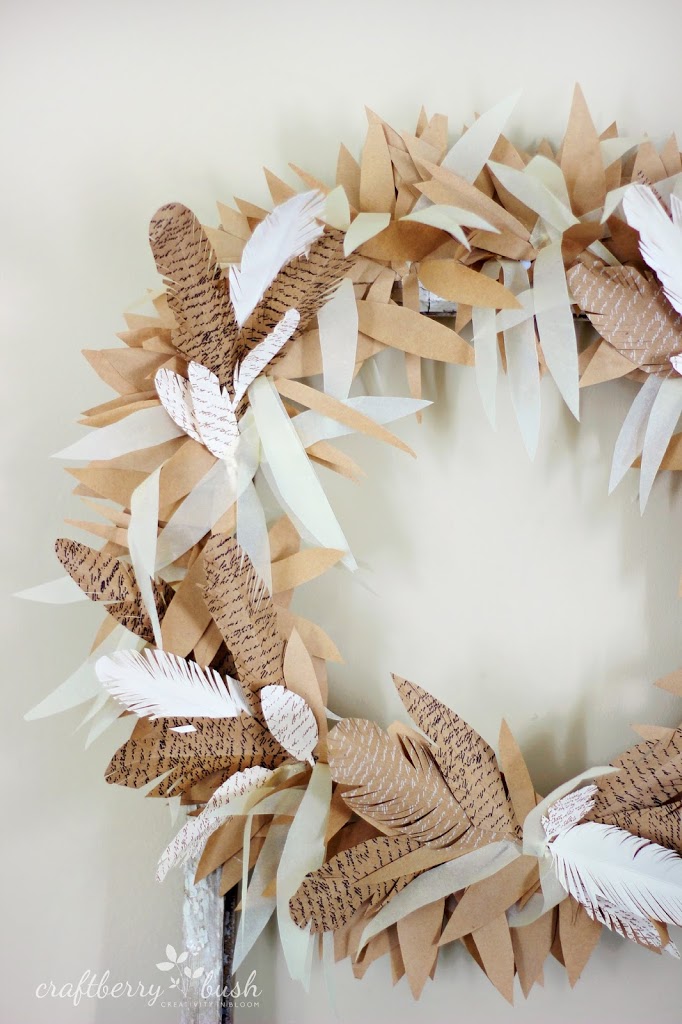
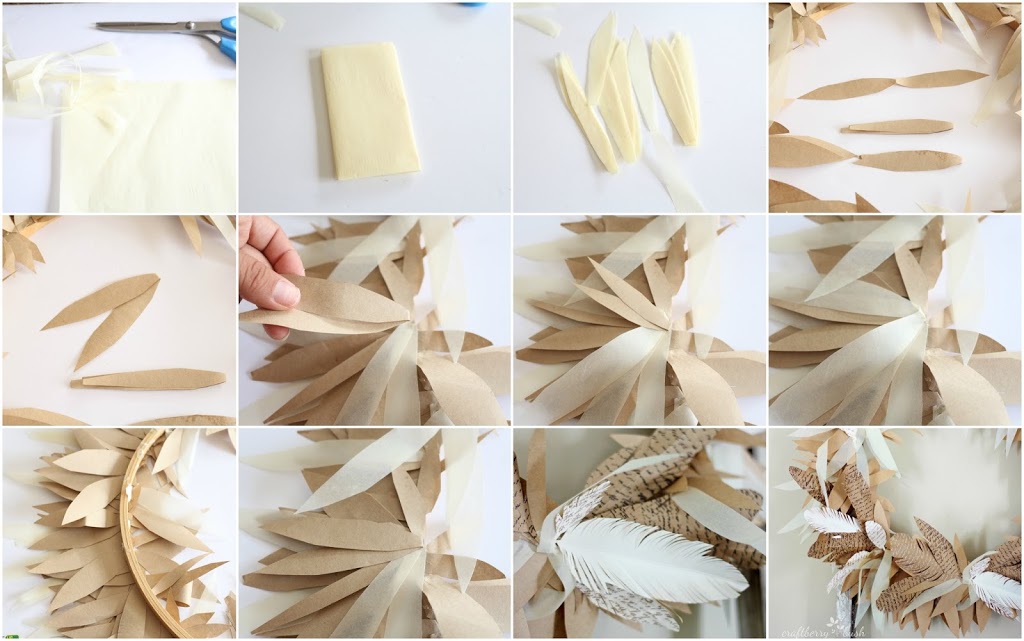
For the wreath, I simply folded both the paper and the tissue in an accordion fold and cut several long leaf shapes. I then just glued them randomly along the embroidery hoop. Making sure that there was a variety of sizes and textures along the way.
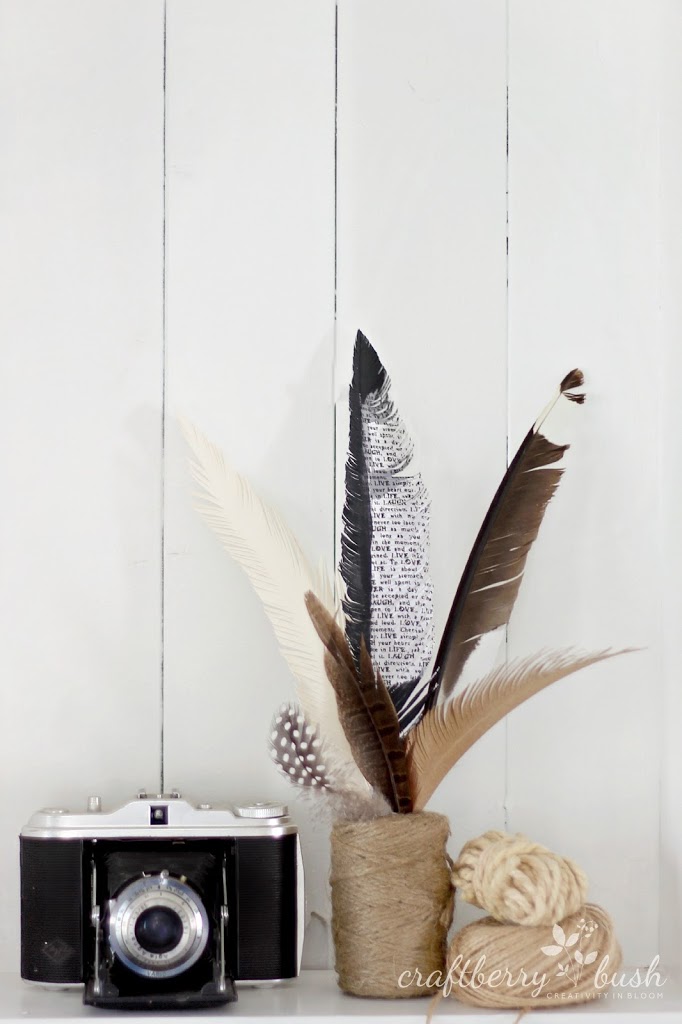
I finally added some of the paper feathers.
As with any wreath you have to stand back and make sure it looks balanced all around.
Add or take away as you see fit.
I finally added some of the paper feathers.
As with any wreath you have to stand back and make sure it looks balanced all around.
Add or take away as you see fit.
I originally wanted something different and unique and
I think that by using paper I achieved that.
If you have any questions or need clarification
please leave a comment or send me a message.
Thank you so much for dropping by.
Make sure you come back on Wednesday as I join some of my friends and
walk you through the rest of our fall house tour.



This turned out really great! Those feathers with words on them look awesome.
So pretty! I’m with you on editing photos. Not enough time in the day, right? Can’t wait to be inspired by the rest of your home tour this week!
Lucy, your feathers are really beautiful! Thank you so much for sharing your process. I’m hoping to make them with my daughter some day soon. Looking forward to seeing your fall home tour!
beautiful. tfs the tutorial with us. 🙂
This is so cute! I can’t wait to try it myself—thank you for sharing it with us!!
http://KatrinaCrouch.blogspot.com
Great idea! I have a project in mind that requires feathers & I couldn’t figure out where I was going to get them from. This is perfect! I would love if you linked this up to Pin-Worthy Wednesday! http://thehoneycombhome.com/pin-worth-wednesday-4/
I love this! Melissa from The Sweet Escape introduced me to your blog and I love it – another fellow Canadian! I included you in my weekly link round up today 🙂
As much as I don’t like using (real) feathers in DIY projects I must say that I simply adore the paper feathers you made. This is such a great idea, especially because I love to work with old book pages. The wreath looks amazing, though for starters I will simply start out with one feather and put it in my pencil holder. 🙂
Lucy, love how your feathers bring a bit more nature inside that is timeless and all season. Thank you for sharing your process!
You’ve described a busy and fulfilling weekend, and it’s refreshing to see that even in the midst of a hectic schedule, you’re taking the time to share a paper feather wreath tutorial. Your dedication to both family and creative pursuits is truly admirable!
laminate floor installation in Indianapolis IN