Before anything else, I wish to pay my respects for those affected by the tragic events in Boston. It is disheartening to see these events occur with such frequency and it is my sincere hope we never become desensitized to seeing such ugly violence, but band together.

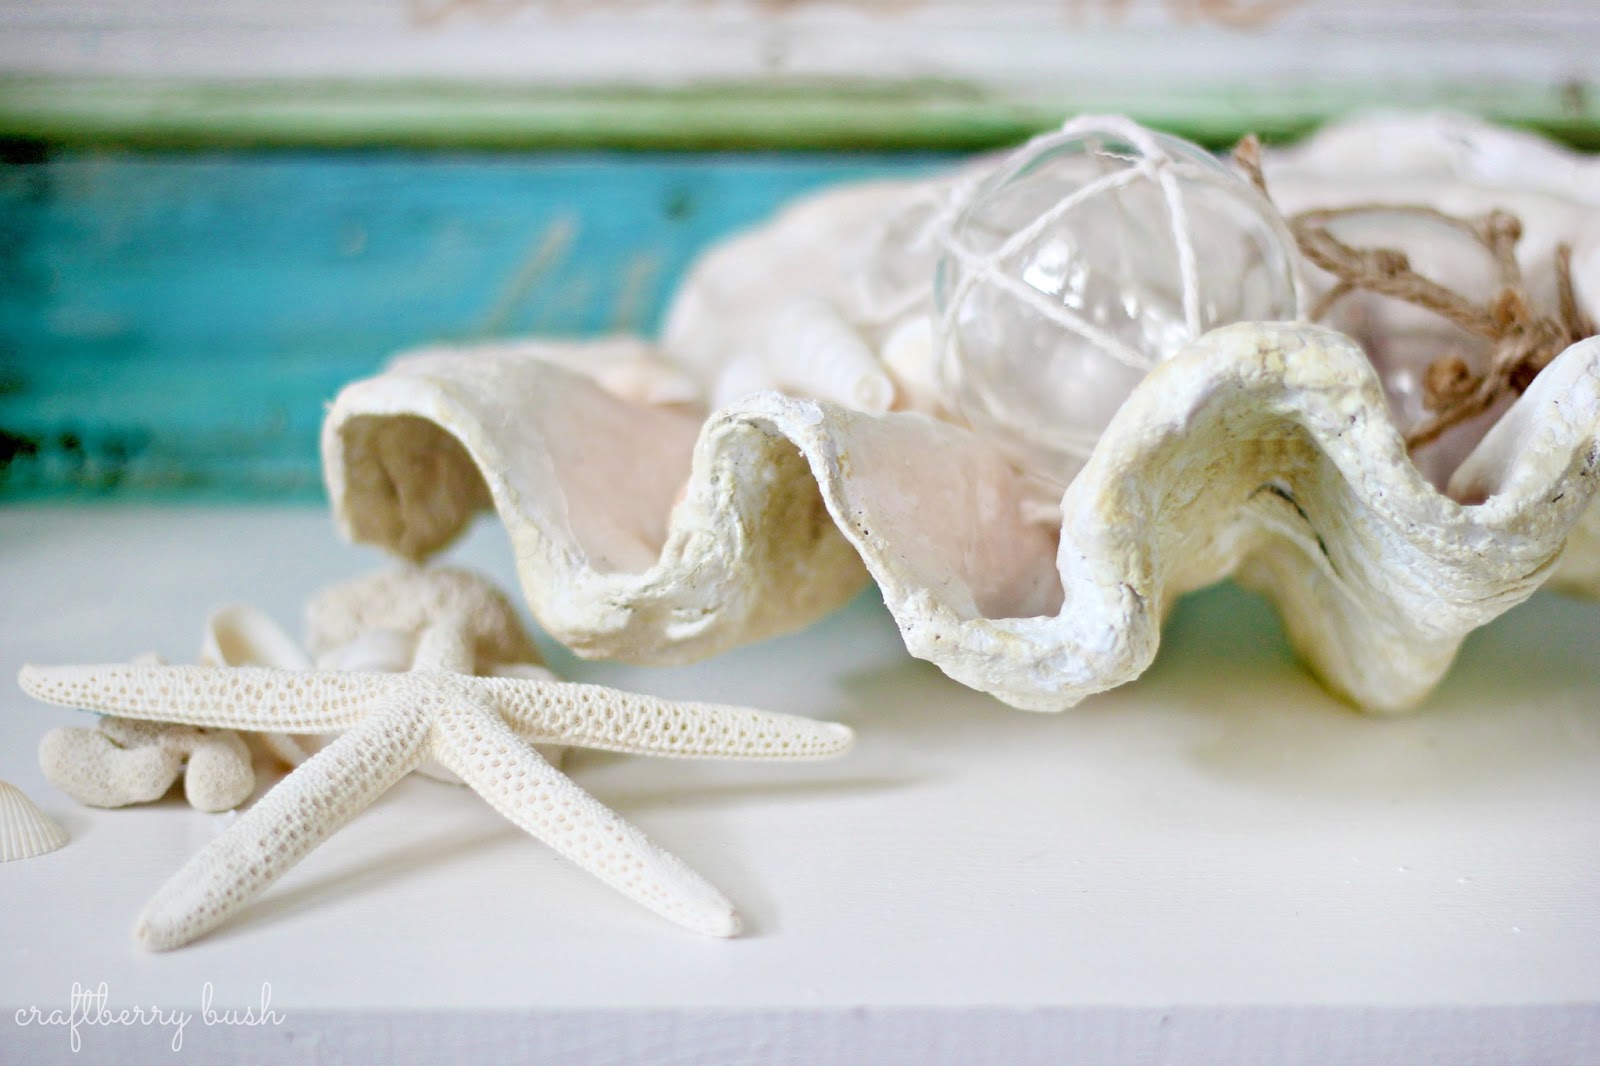
Reluctantly, but as promised, here is the tutorial for the Giant Clam Bowl shared yesterday.
basil green paint
true burgundy paint

1. Line bowl with plastic wrap and lightly spray with cooking oil
2. Shape tin foil into cylinders and place inside the bowl as shown
3. Cut a piece of cast roll long enough to cover the foil and allow enough material to drape in between the foil
4. Fill a separate bowl with warm water and dip the piece of plaster in the bowl until the material is wet, but not dissolving completely (usually one or two seconds); allow the excess water to drain back into your container
5. Smooth over tin foil
6. Cut several small pieces of plaster, dip in water and place over first layer; continue to place strips waiting for the previous layer to feel dry to the touch (3-5 mins)
7. Set aside and allow to dry for 12-24 hrs
8. Remove clam from bowl and turn over; repeat step 6 and allow to dry for about an hour
9. Take some wall plaster with your fingers and apply onto surface making sure to cover any cracks and texture left behind from the roll
10. Allow to dry for an additional 12-24 hours
11. Using a ratio of 12:1 metallic pearl to burgundy, paint the inside of the clam
12. Using a ration of 6:1 white and green basil, paint the underside of the clam
13. Allow to dry


much love,


Love your giant clam bowl which is also very trendy. Your tutorial is spot on and very easy to follow. But I’m not familiar with plaster roll. I’m sure it must be sold where you find wall compound or drywall but I’ve never seen it before. Can you tell us a bit more about it?
I got some at michaels
Wow, this is awesome! You are so talented! ~Angela @hickorytrailblog.blogspot.com
That is truly amazing! I have been wanting to buy one but now I definitely don’t want to spend the money!
-Shelley
grazie per la condivisione del tutorial ….ci provo anch’io ciao
Gio
This is amazing!!!!! Wow girl….you knock my socks off! It truly looks like the real thing! What a beautiful piece!
This is awesome. Thank-you!
Amazing I never though of useing plaster roll before. You really are so talented its a work of art xxx
this is so cool, we use to sell these at the store I worked at and I always wanted one!! Thanks for sharing Lucy 🙂
Thanks for showing how you made this……it looks great !! So talented !!
Your sentiments for the people of Boston are much appreciated. I love this clam shell DIY and really want to try making my own. I love this look! Thanks for the tutorial. 🙂
Amazing thank you so much for sharing!!
thanks for your thoughts about our wonderful city – I’m on wht waterfront – a good distance from the explosions, but my building went on lockdown yesterday and today National Guard are all over the place – very sad, but we’re pretty resiliant here. Your clam shell is wonderful and I’m going to pass it on to my sister, who will love it
WOW! It really looks like a real shell! Awesome idea. If you get a chance, please share it on my linky party: http://suburbsmama.blogspot.com/2013/04/sunday-linky-party-3.html
My jaw dropped over this. WOW! Recently I fell in love with some beautiful but expensive serving pieces from Pottery Barn that look like shells and sea creatures. I can’t afford those, but this will help me get my aquatic fix. And it looks like something I could actually DO, too!
Love.
<3 jen @ librarian tells all
Wow! I never would have thought of trying to make one of these. This turned out beautifully! 🙂
We’d love for you to share this over at our link party, Much Ado About Monday, if you get a chance! 🙂
http://www.huckleberrylove.com/2013/04/much-ado-about-monday-no-5.html
~Emily
http://www.huckleberrylove.com
Just found you & this project via Pinterest. Absolutely love it. So clever and will be a lot less expensive than buying one. I had no idea plaster roll (aka plaster cloth) existed. Had to look it up on the web. Looks like Amazon sells a couple of different styles, but will have to check out my local Michael’s as well. Thanks so much.
I can’t believe you made the shell– That’s ridiculously awesome!!! As always, beautiful project. I absolutely love it.
~Melanie
Love this Lucy – would look amazing with my collection of shells … and old glass buoys!! Sharing on my FB page today – so everyone can have something as fabulous as this!
Kelly
Thanks so very much for sharing how you made this amazing clam shell! They are so expensive and I feel bad for the clams that they harvest for the shell. I will have to try this out soon!
this is so awesome! great work as always Lucy! thanks for being such an inspiration! enjoying the new layout and design too!
What a Wonderful Blog !!!!! I am in the process of making the clam shell. Approx. how many layers of plaster cloth did you add to top and bottom ? You really have so many crafts I want to try..very inspirational. Thank you.
You are simply amazing!! I LOVE this!
This may be one of the most amazing DIY projects ever. Seriously. Found this via the Pinterest link party. LOVE!
Hi Lucy
It’s probably a silly question, but do you take the foil out when you turn the shell over to do the back? I’ve got all my kit now and am ready to go but don’t want to mess it up.
Judi in the Uk
Why reluctantly? I think it’s a lovely gesture to share what you know; at least the majority of it anyway.
Check out Katty’s Kosy Cove for a different take on making a Giant Clam shell.
AWESOME CLAMSHELL!
I cant wait to try this.
And how is this for irony – as Im surfing the net the 10pm News is on.
They just announced the Boston Marathon bomber was sentenced to death TODAY.
Justice for him but TRUE JUSTICE would be if those killed were able to come back and those injured were not injured.
Prayers for victims.
Hello! Thank you for sharing this tutorial! I just made one of these using your instructions and I LOVE LOVE LOVE IT!! I do however have a quick question for you- after you apply the plaster with your fingers and let it dry, the pieces of plaster seem to chip off…. Is this normal? Can you recommend anything I can do to keep pieces of plaster from chipping off? Any advice is MUCH appreciated!! 🙂 thank you!!
This is Beautiful…………. Just Wow……
Lots of questions – no answers. Any reason for this? I have made flowers dipped in paster and they were very fragile – bits broke off, so would really like to know how to make the plaster more durable.