Hello friends, I hope you had a great long weekend.
While blessed with beautiful weather to mark the unofficial end of summer, we spent the entire weekend prepping the house for an upcoming Christmas shoot. But more exciting than that was hubby gave me the best anniversary gift by finally finishing our stairs. I can’t wait to show you their magnificence! HA. They’re currently primed a brilliant white and I kinda wish I could keep them that way, but with three kids and a dog, I know better. We will have them all done in the next 2 days, but I digress.
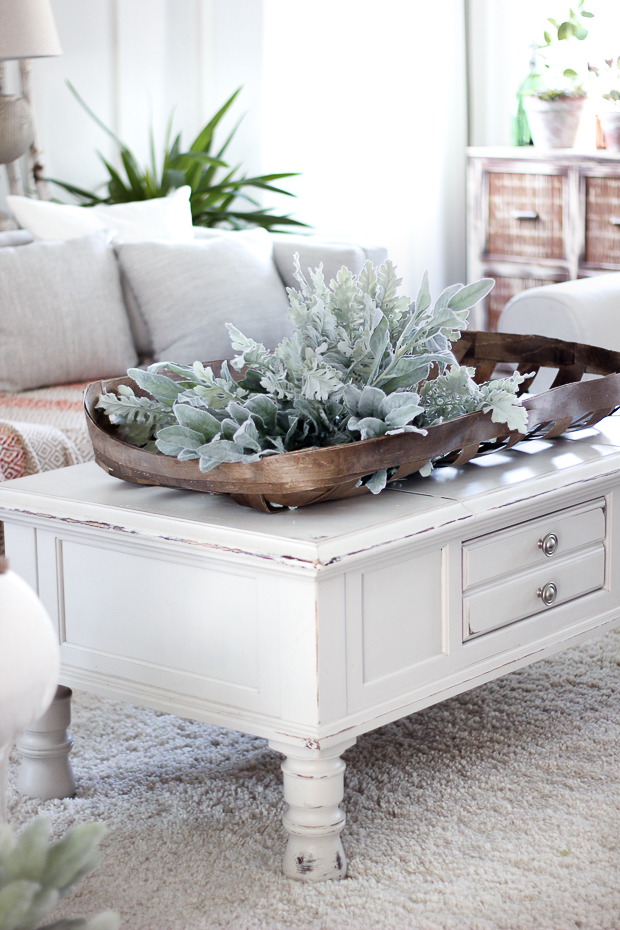
If you follow me on Instagram, you may recognize this photo that I had shared last week. It’s my newest DIY and though not perfect and probably a little unorthodox, it was
a lot of fun to create and to challenge myself. I realize that basket weaving is a true art with legitimate supplies and methods, so I apologize in advance to those of you who work hard at your craft. This is meant to be a knock-off and to get the ‘look’ of a real tobacco basket.
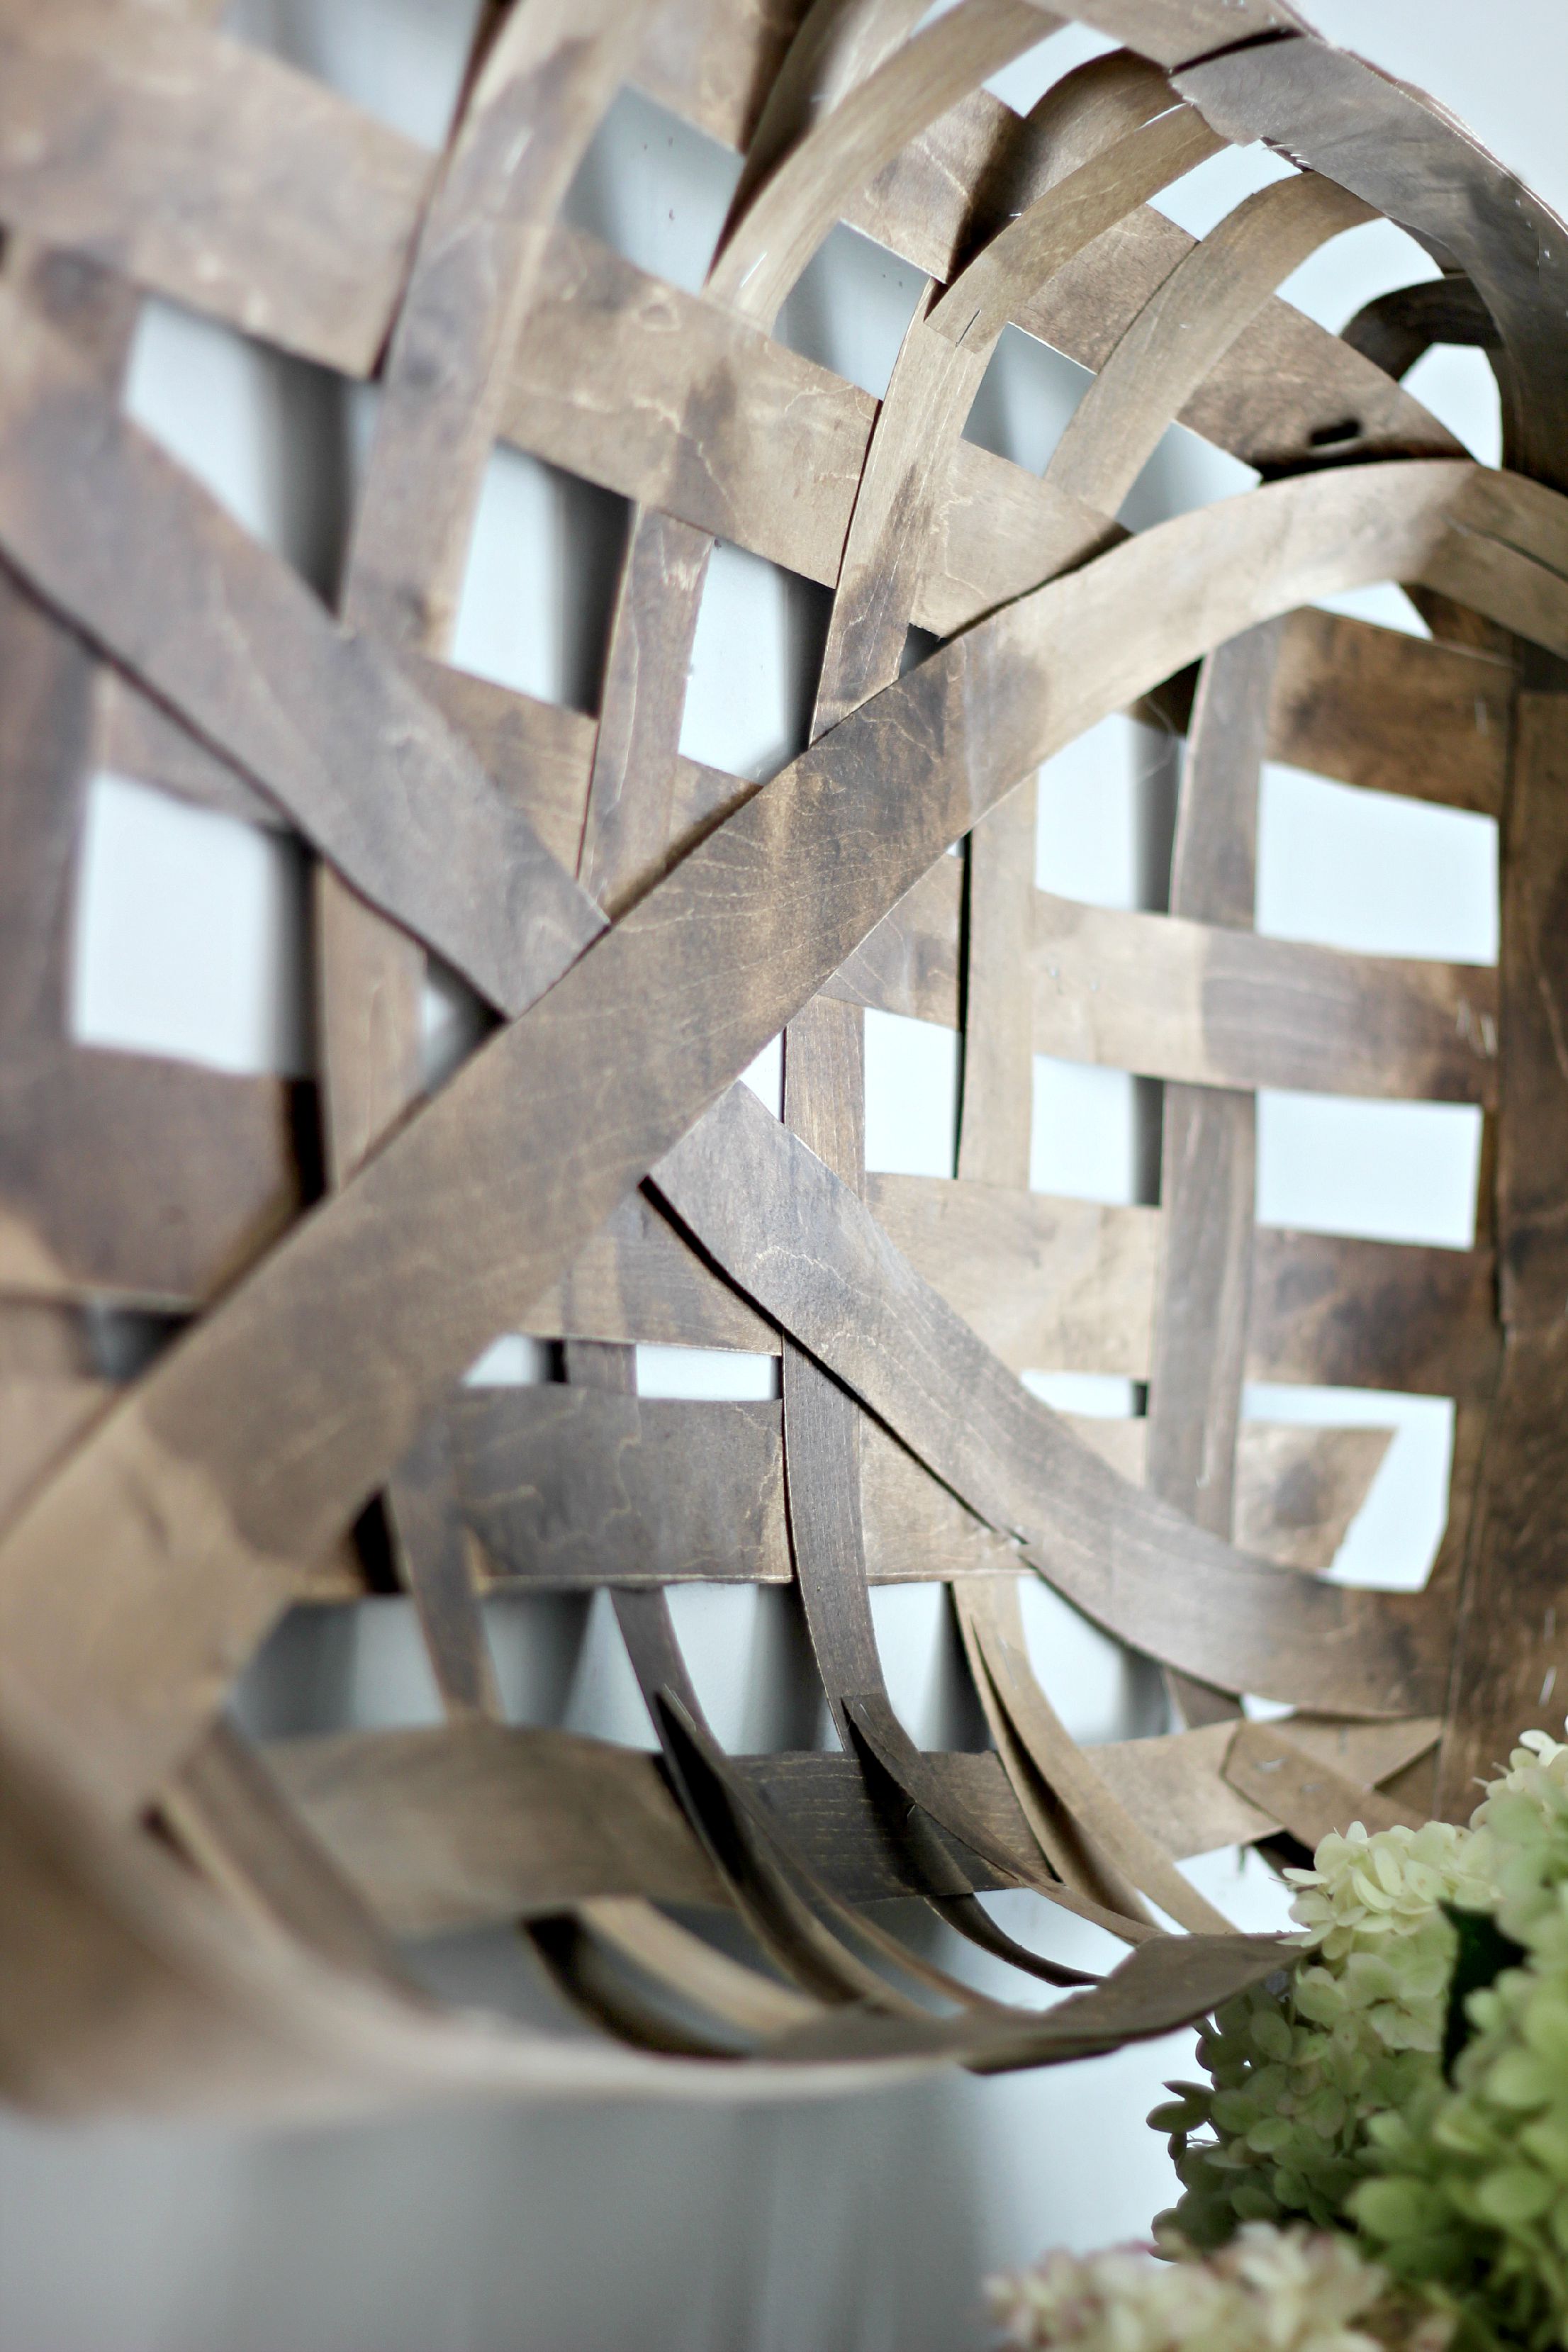
Have you ever heard the saying “necessity is the mother of invention”? Well, it’s true. It wasn’t that long ago when our family was struggling financially and every penny counted. It was during that time, that I truly learned the value of family and when my creativity blossomed. I had no choice but to make due with what we had, and some of my best ideas (like this one) came from wanting to make our home as beautiful as I could with what we had. To this day, that still holds true. I truly believe you don’t have to spend a lot of money to make your home beautiful and that it is truly the people in your home who make a house a home.
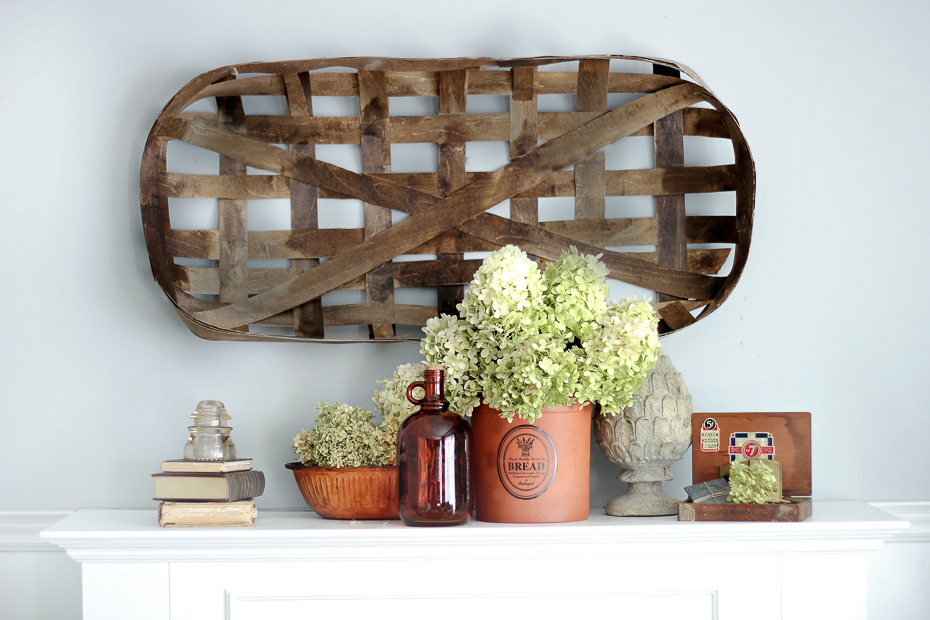
Although this idea did not come under the same circumstances, I still love the idea of using your creativity to create something that is either hard to acquire or costs a little too much. I’ve had this idea in my mind for a while now, but it wasn’t until recently that I decided to give it a try.
The materials I used are of course not the wood splints found with a real tobacco basket, but I do love the way it turned out and I hope you do too.
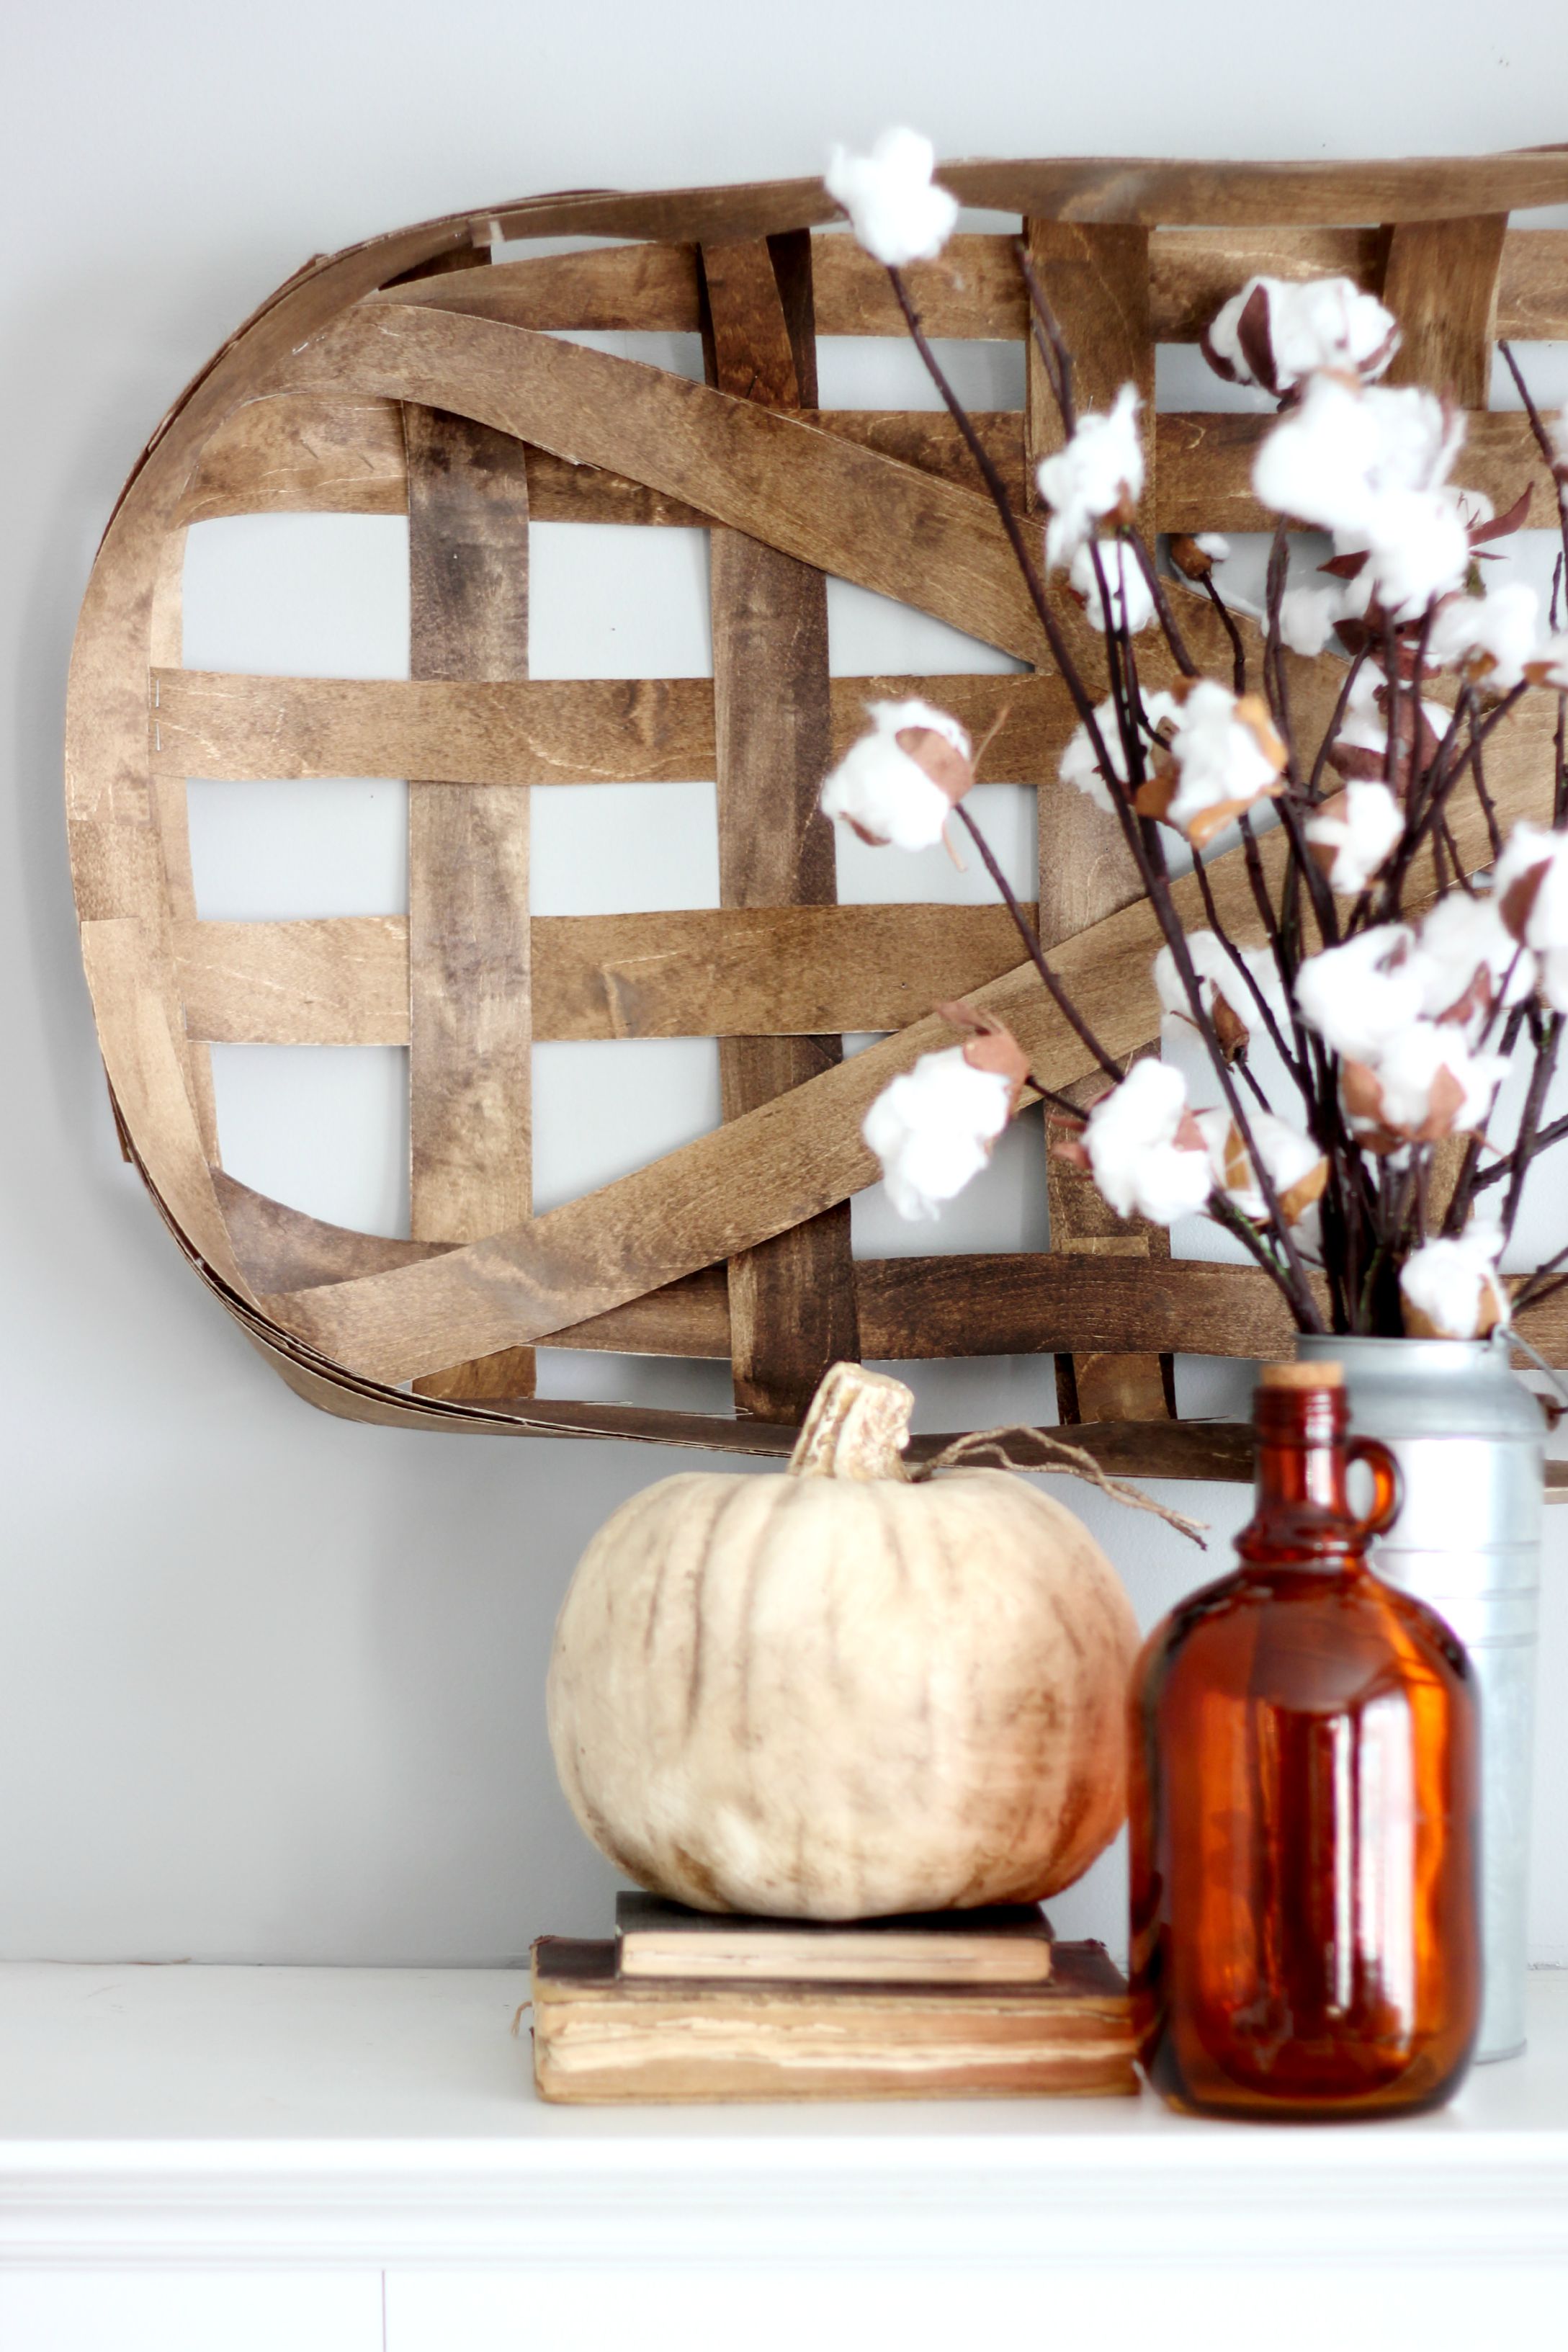
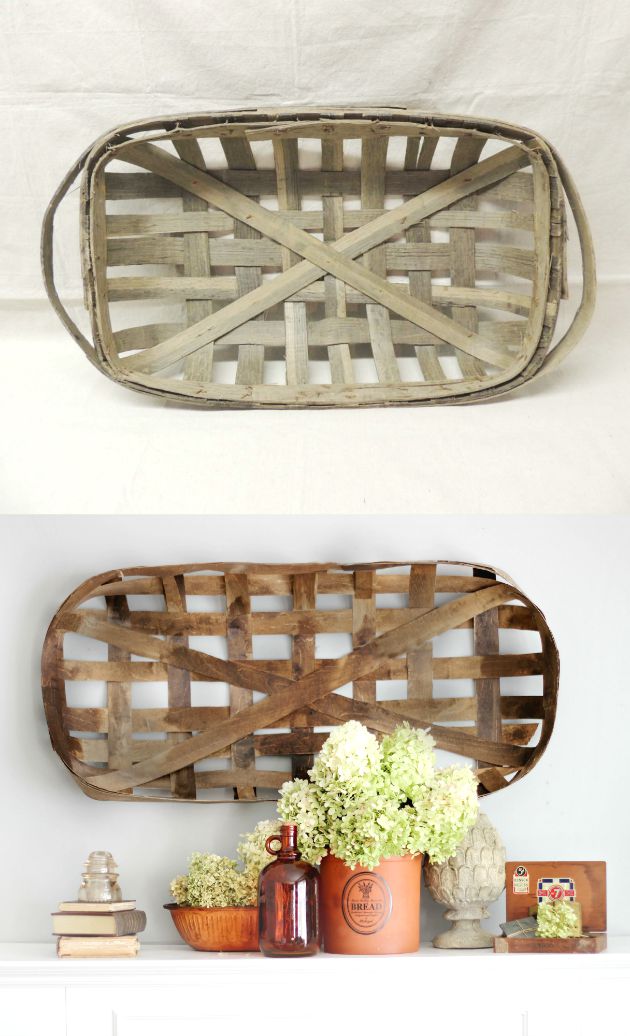
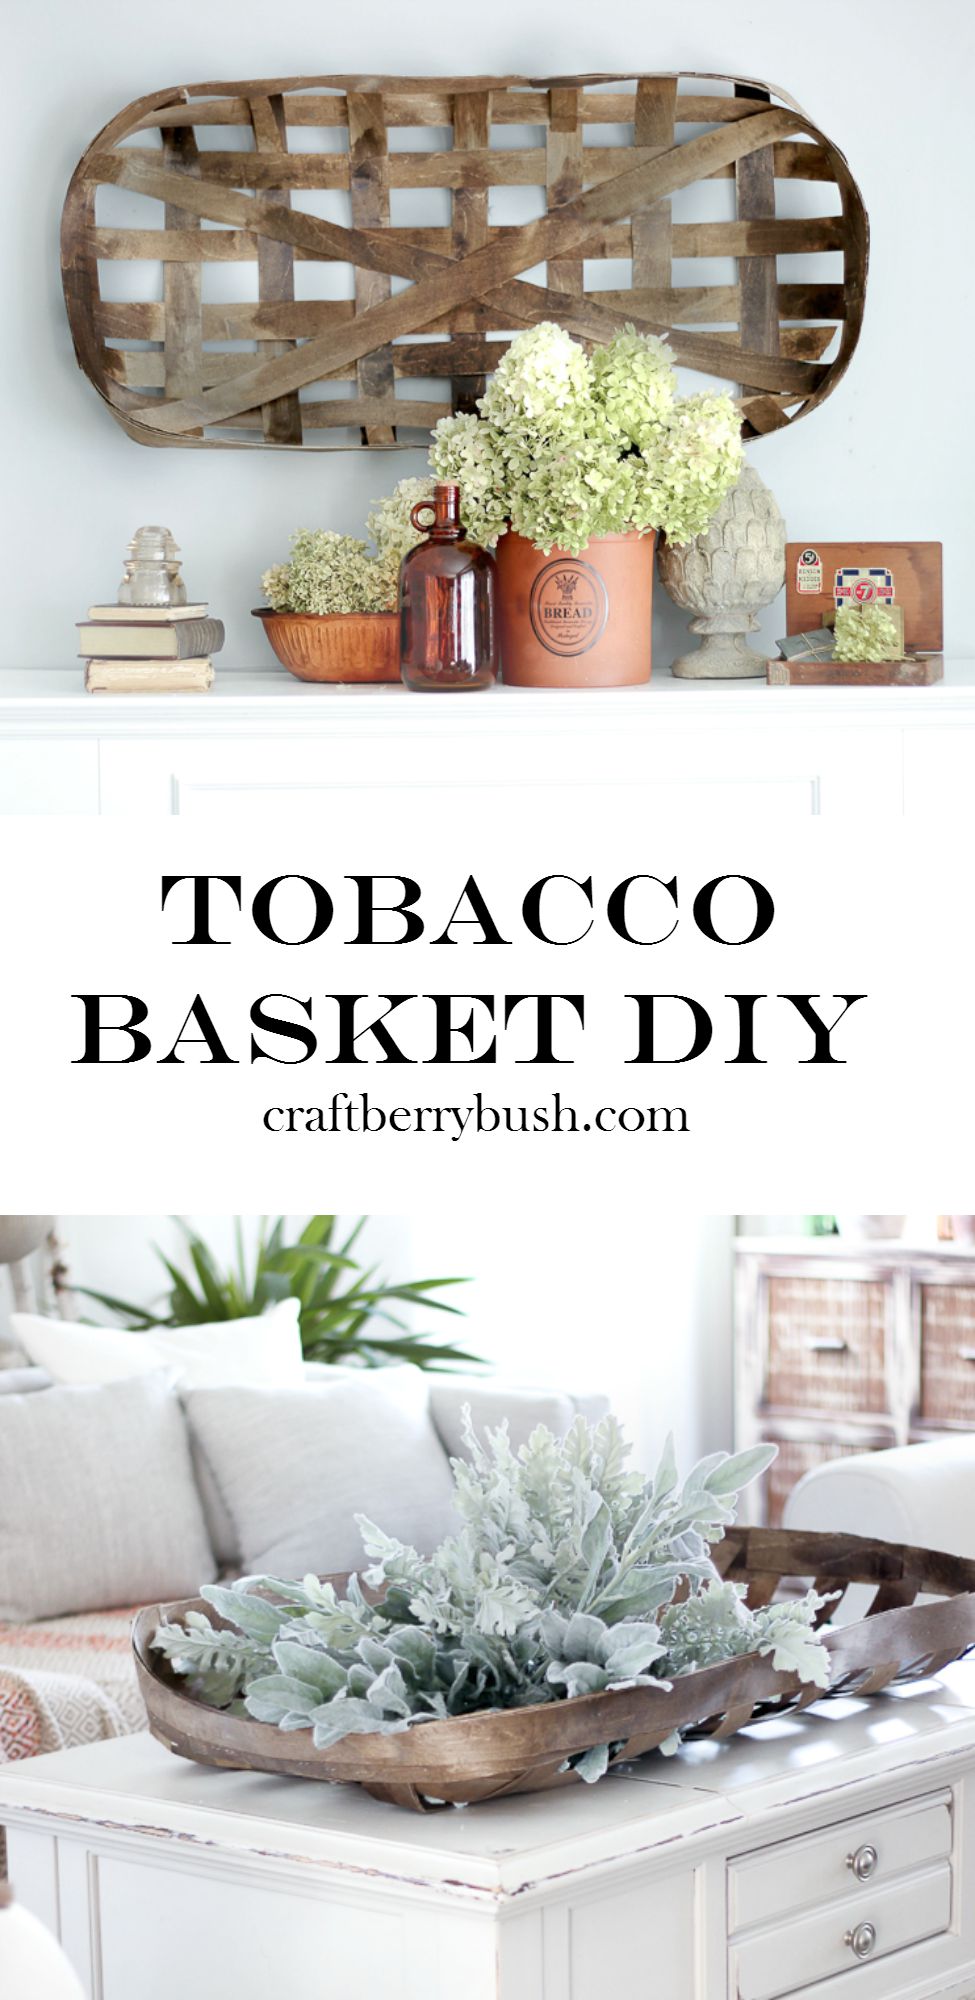
Above image (via) was my inspiration and my version just below.
Materials:
Wood Veneer (I purchased mine at Home Depot or you can find similar online HERE or you can use actual basket reed HERE )
Stapler
Utility Knife
Wood Stain of choice (I used special walnut and dark walnut)
Scissors
Ruler
Heavy item to hold in place (I used books and jars)
NOTE: Pictured are also bamboo stakes (which I thought I would need to make the basket sturdier, but it didn’t require them)
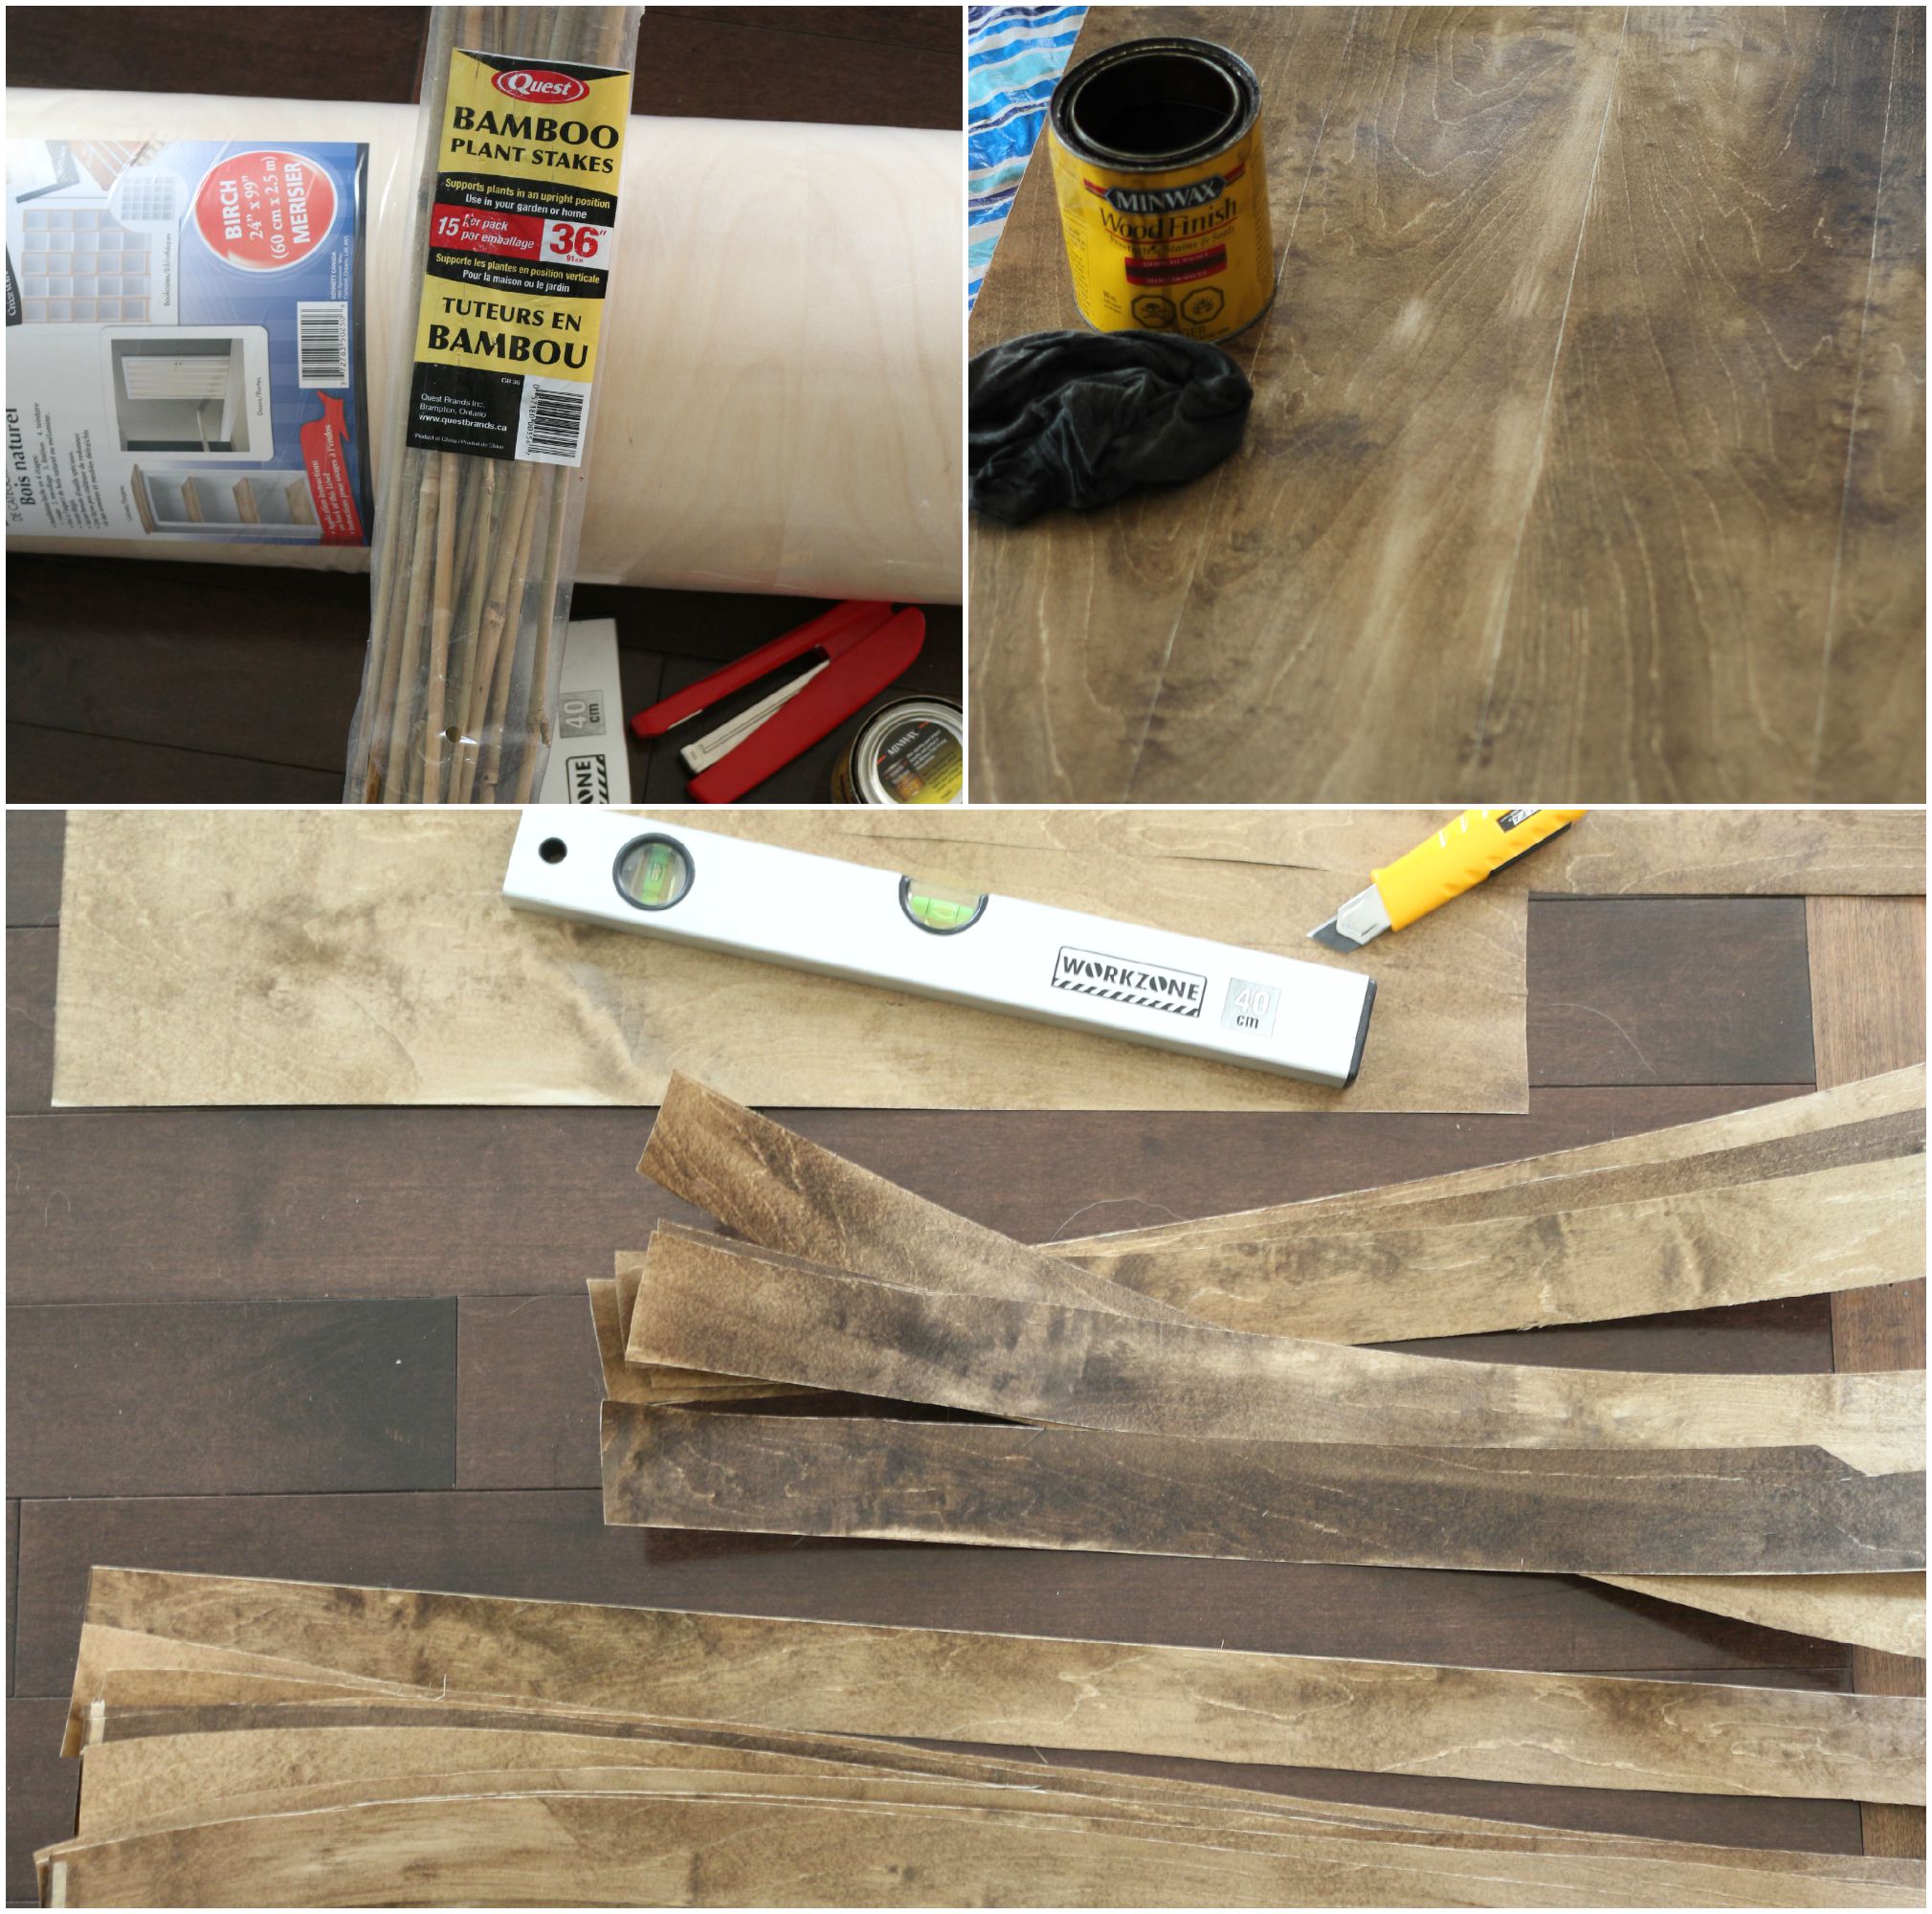
Before you start: plan the size and shape of your basket as well as the width of each of your splints (strips of the basket).
1. Unroll wood veneer and stain both sides as desired. I used a mixture of special walnut and dark walnut by Minwax, but a steel wool and vinegar solution would also work really well to give it that grayish, aged looked.
2. Allow stain to penetrate for about 5-10 minutes. As the stain makes the veneer more pliable, you will want to work before the stain completely dries (I advise wearing rubber gloves).
3. Measure and mark the thickness of each of the strips of your basket (mine measured 2″ wide).
4. Using a ruler and utility knife, cut the desired number of strips along the grain of the wood. My basket had 5 long strips measuring 41″ in length and 7 short strips measuring 21″
NOTE: Cut several extra long strips for the edge of the basket (I used 5).
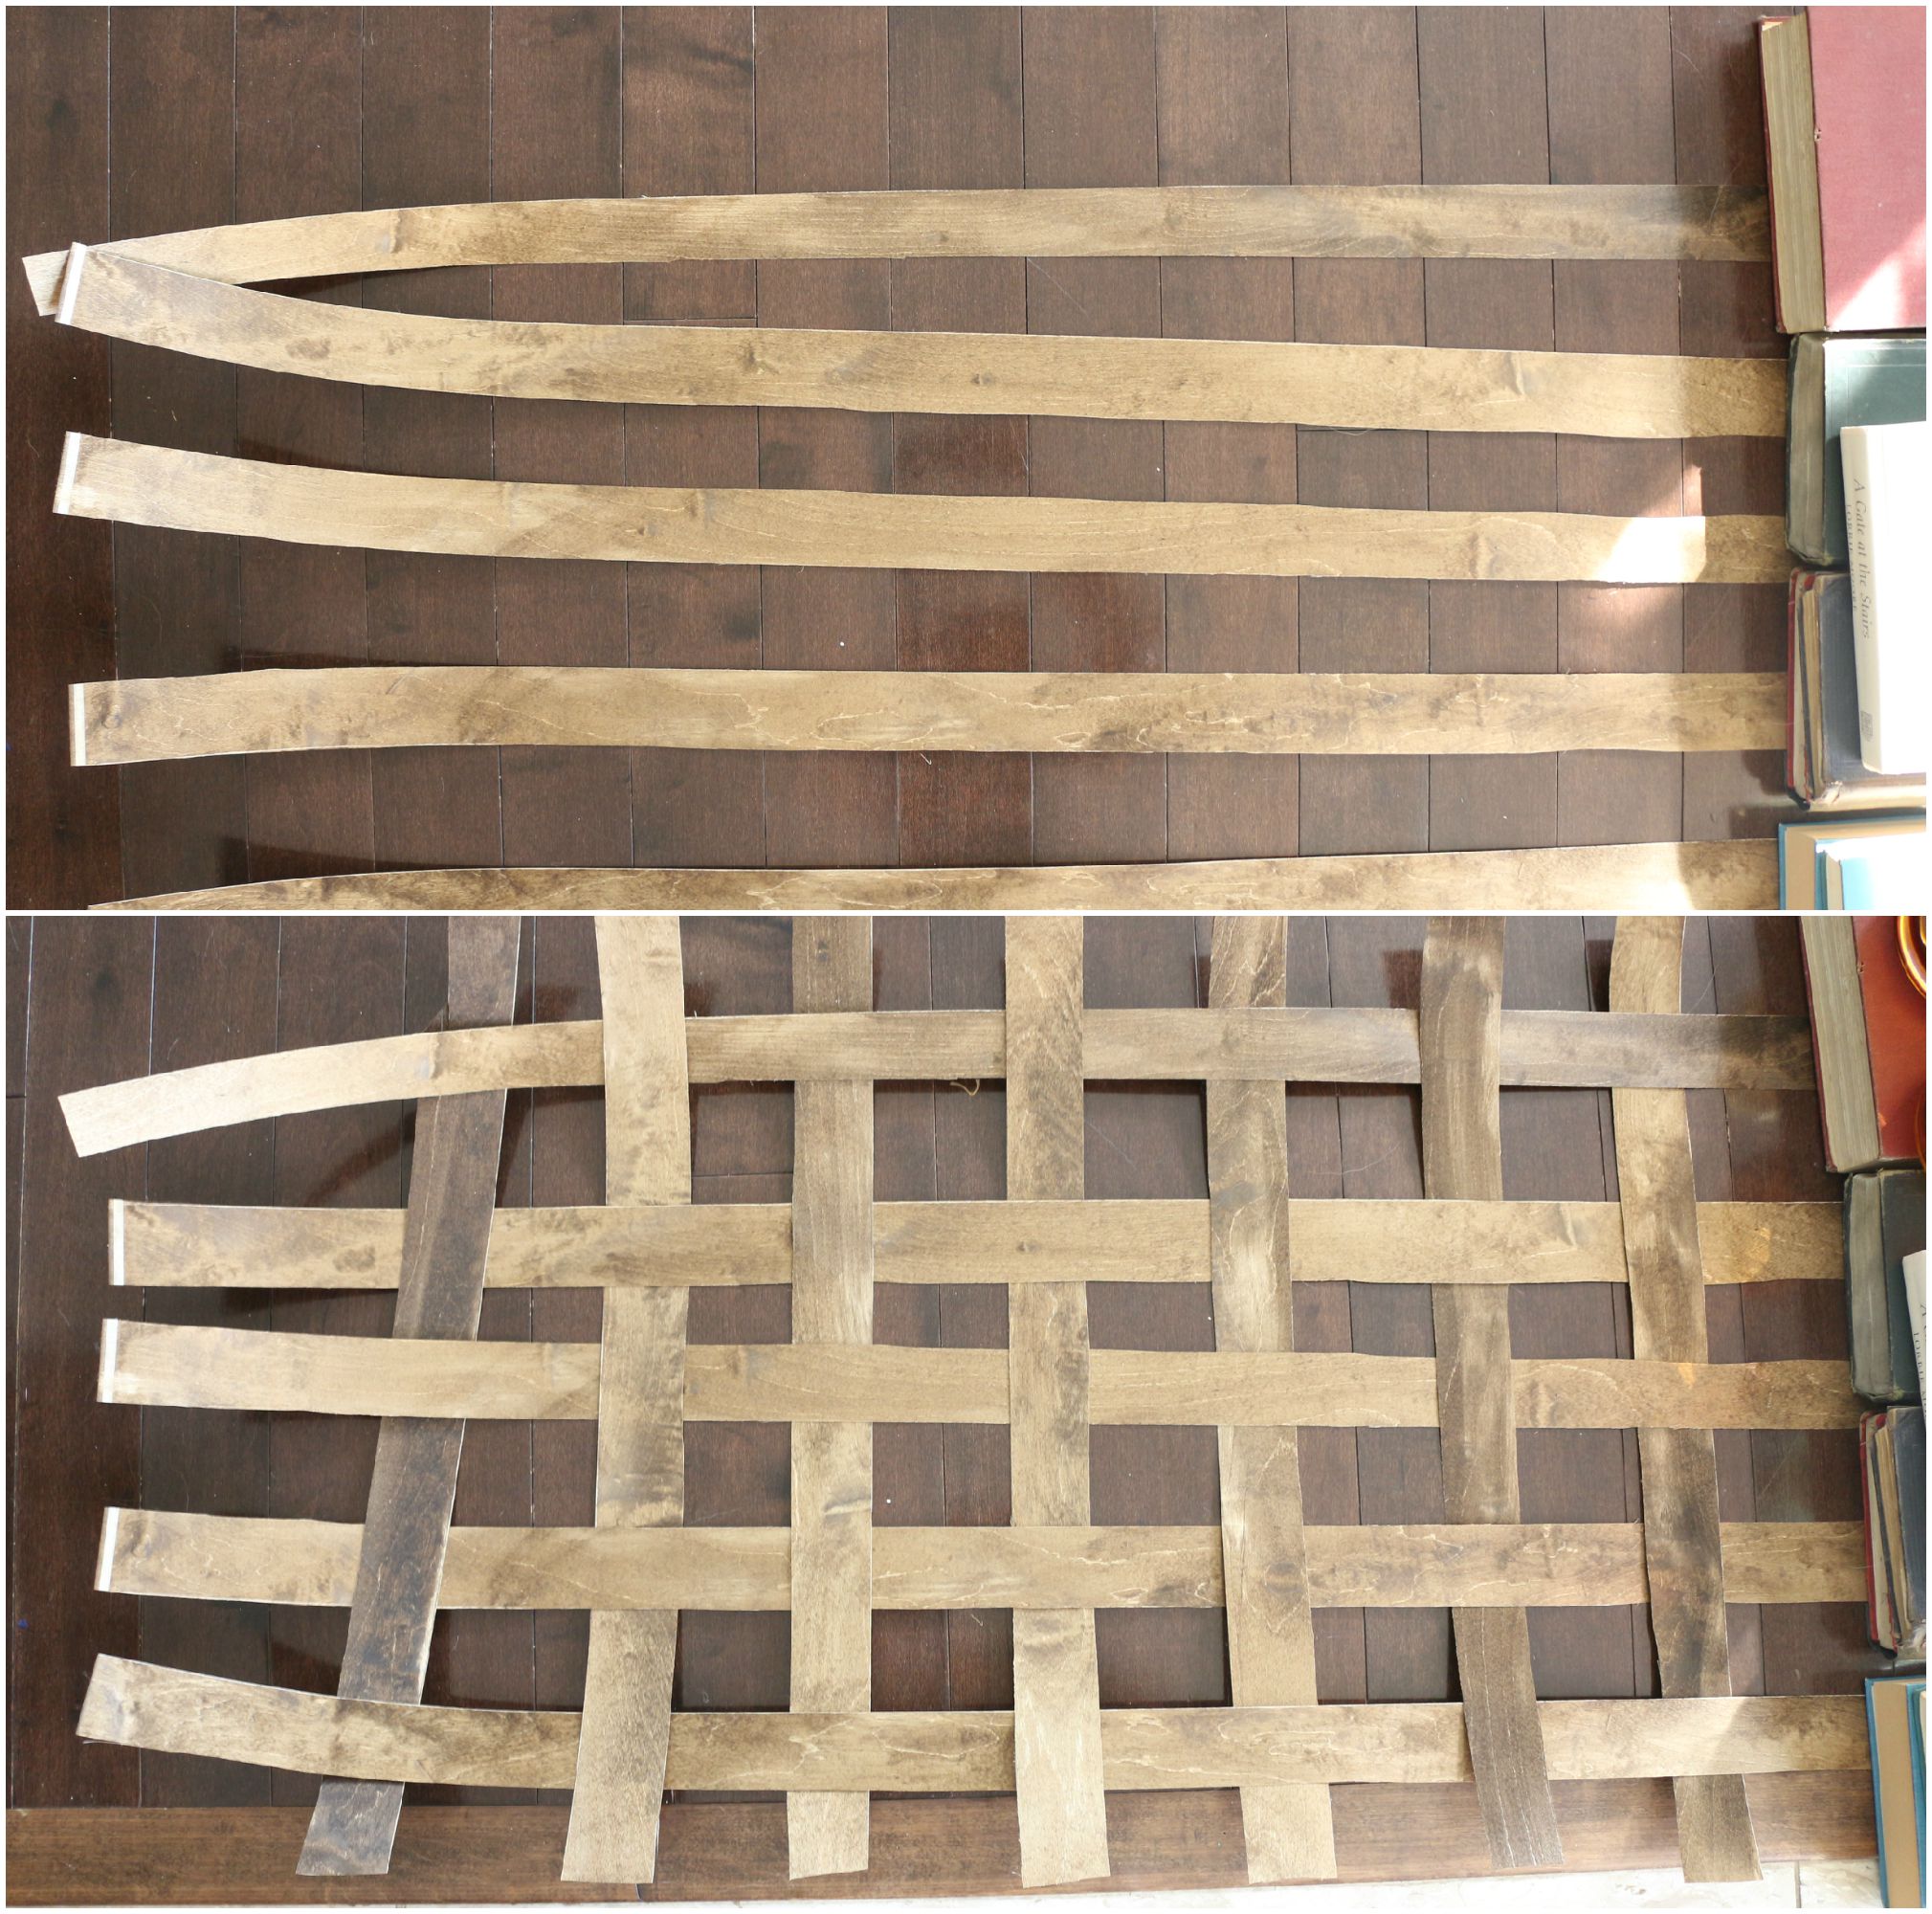
5. Lay your long splints on the ground or flat surface and place a heavy item at the ends (I used books and cans).
6. Weave short splints in an over/under manner through the long splints.
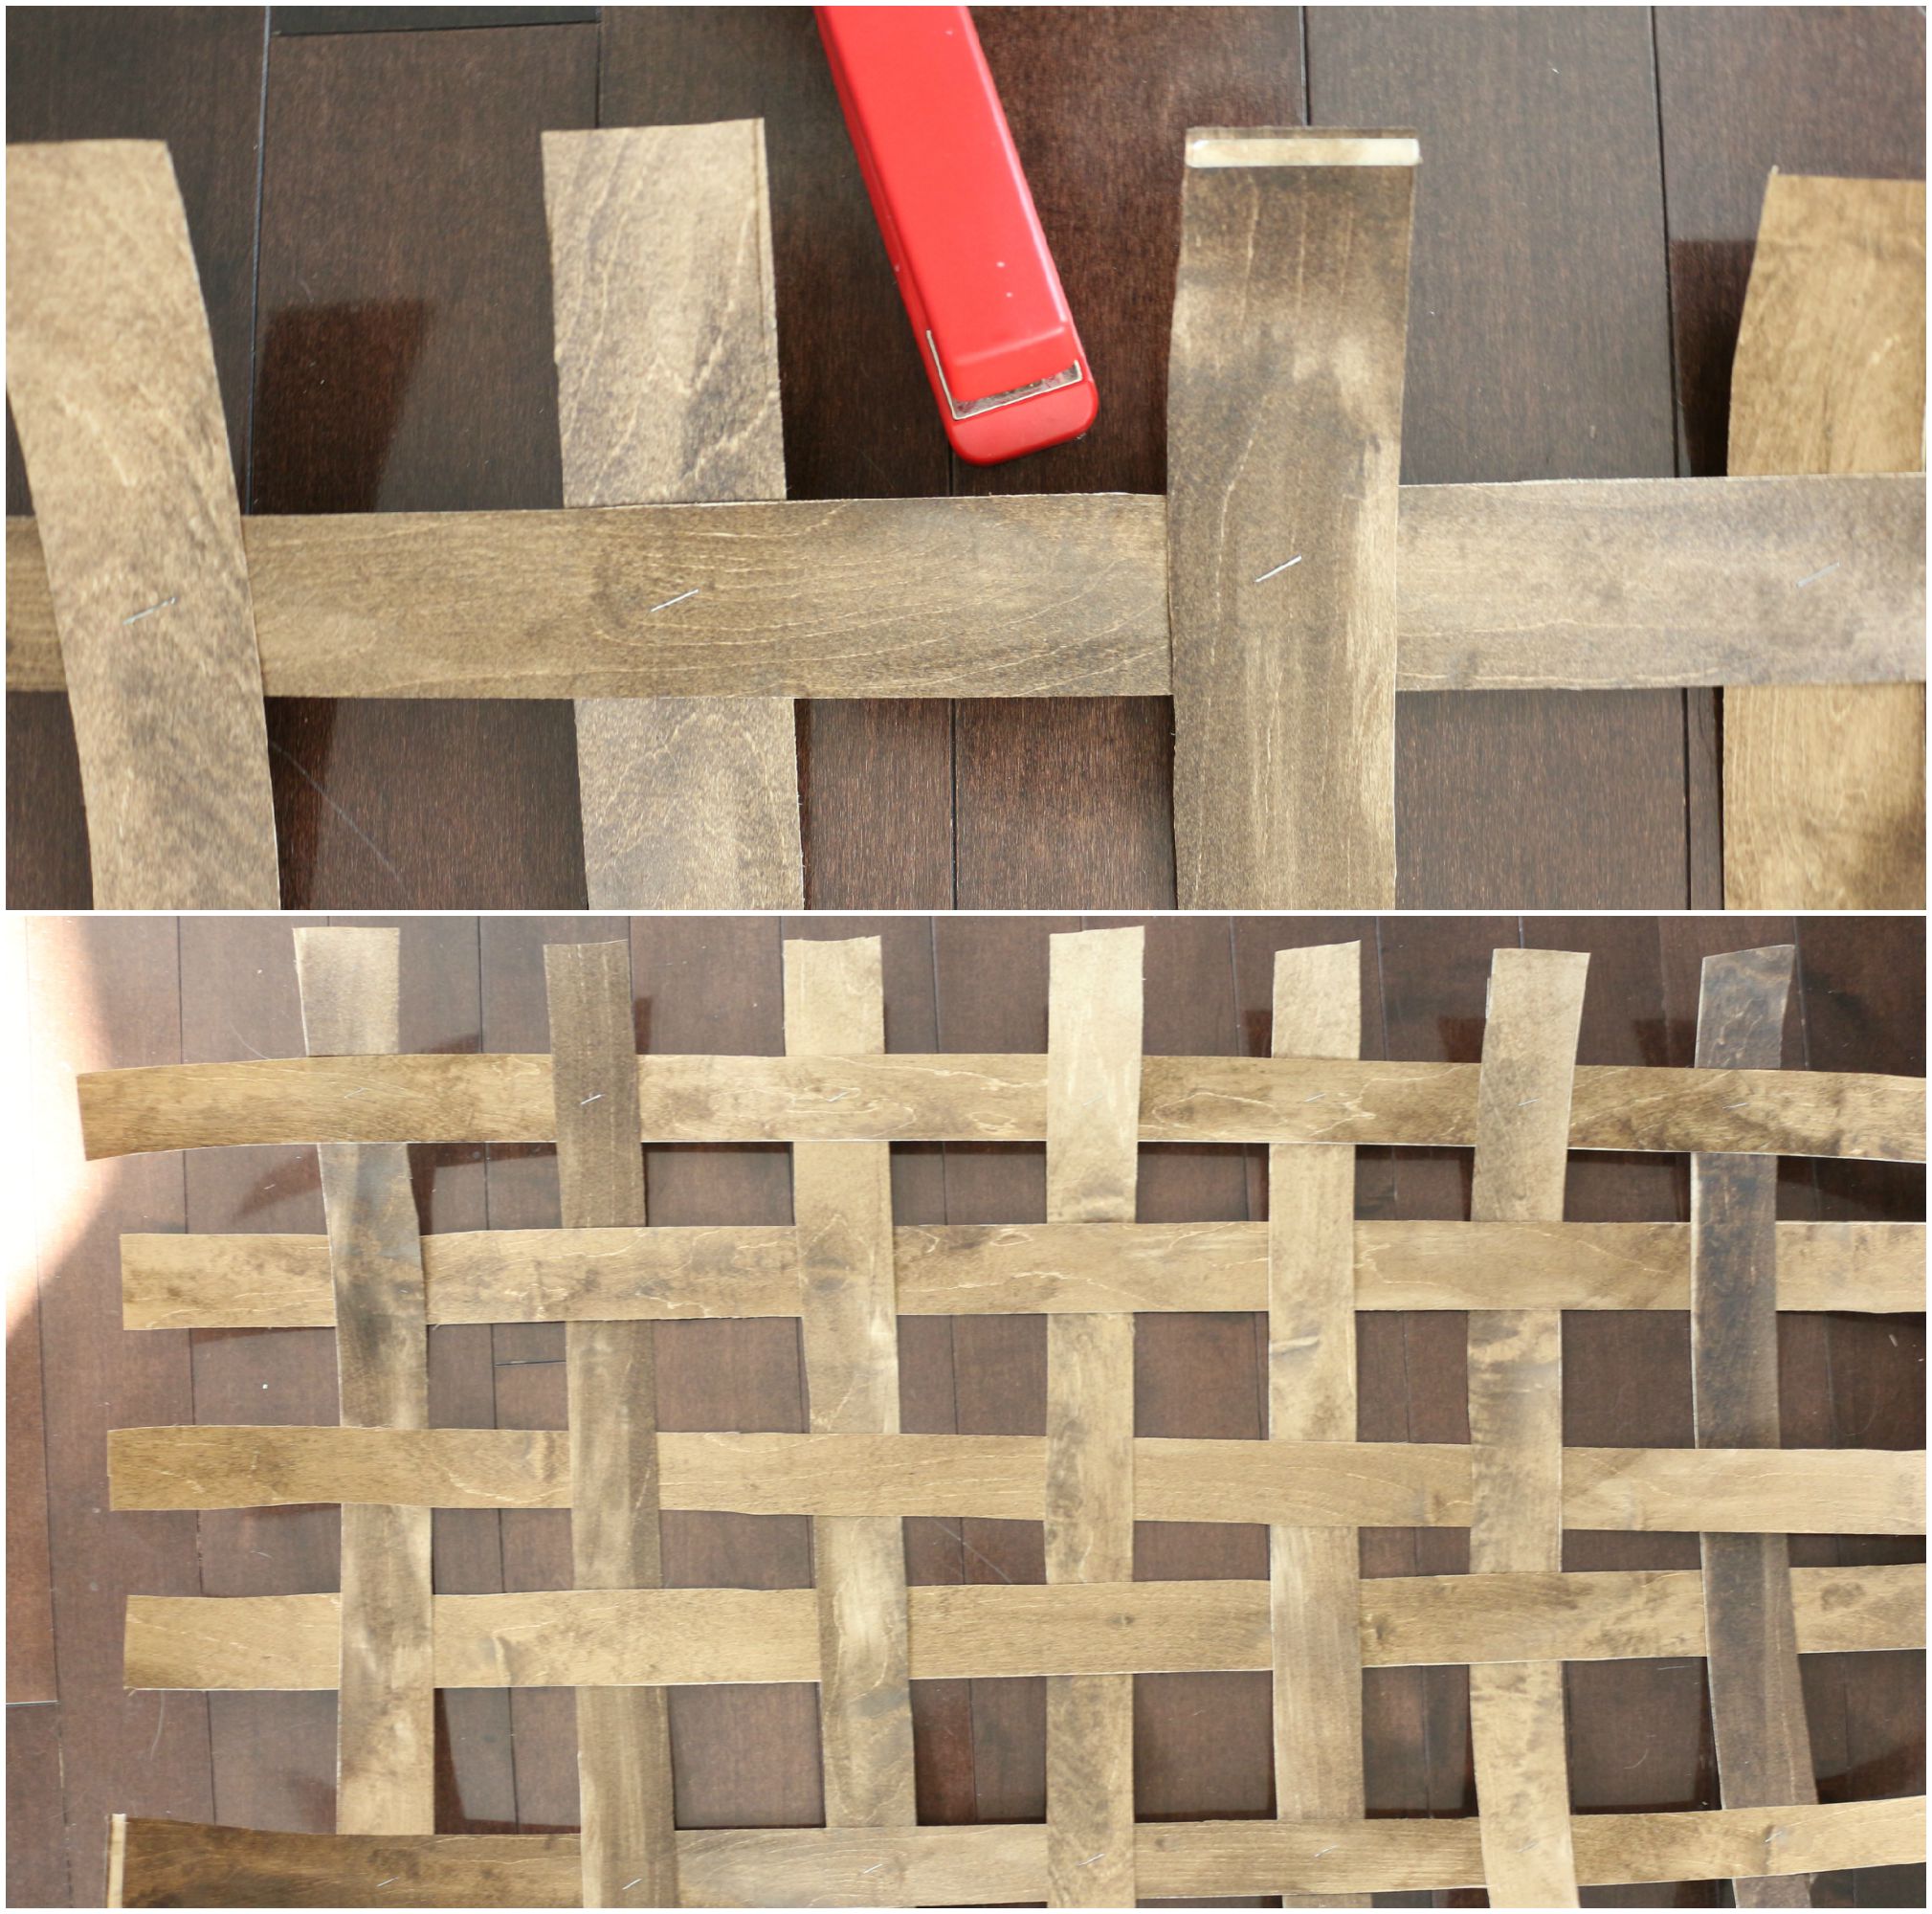
7. Remove weight and rearrange splints if needed, making sure that all the holes are even (I’m not very good at making things even as you can see).
8. Staple ends in place.
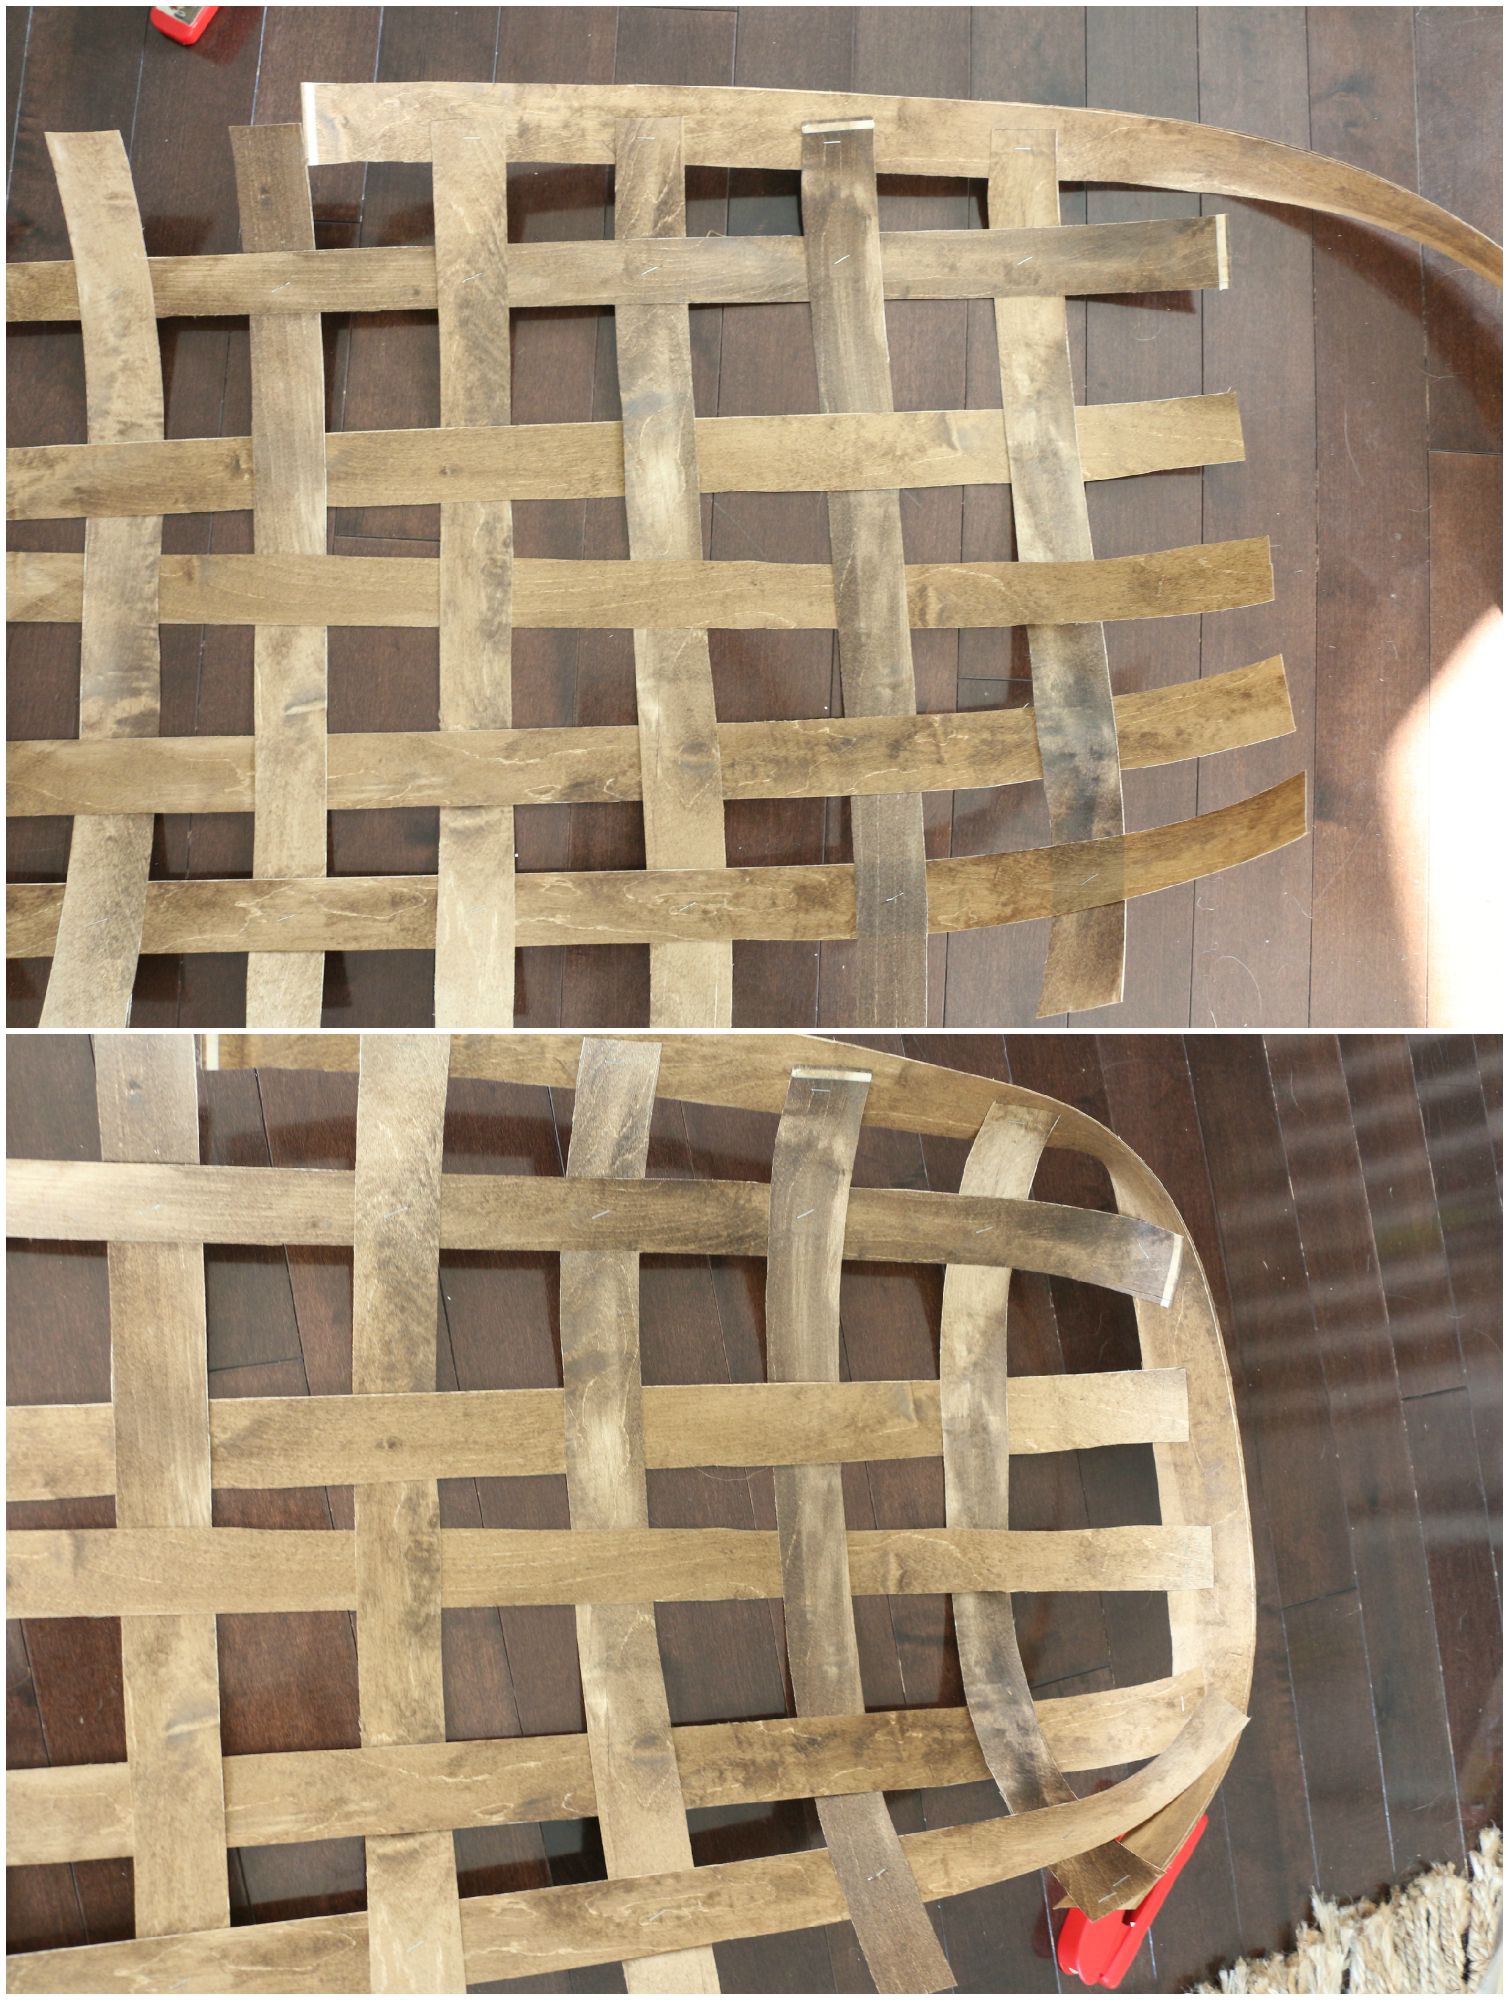
9. Place one of the extra long splints outside weave and start to staple the ends of the splints onto it.
10. Continue to wrap and staple around weave.
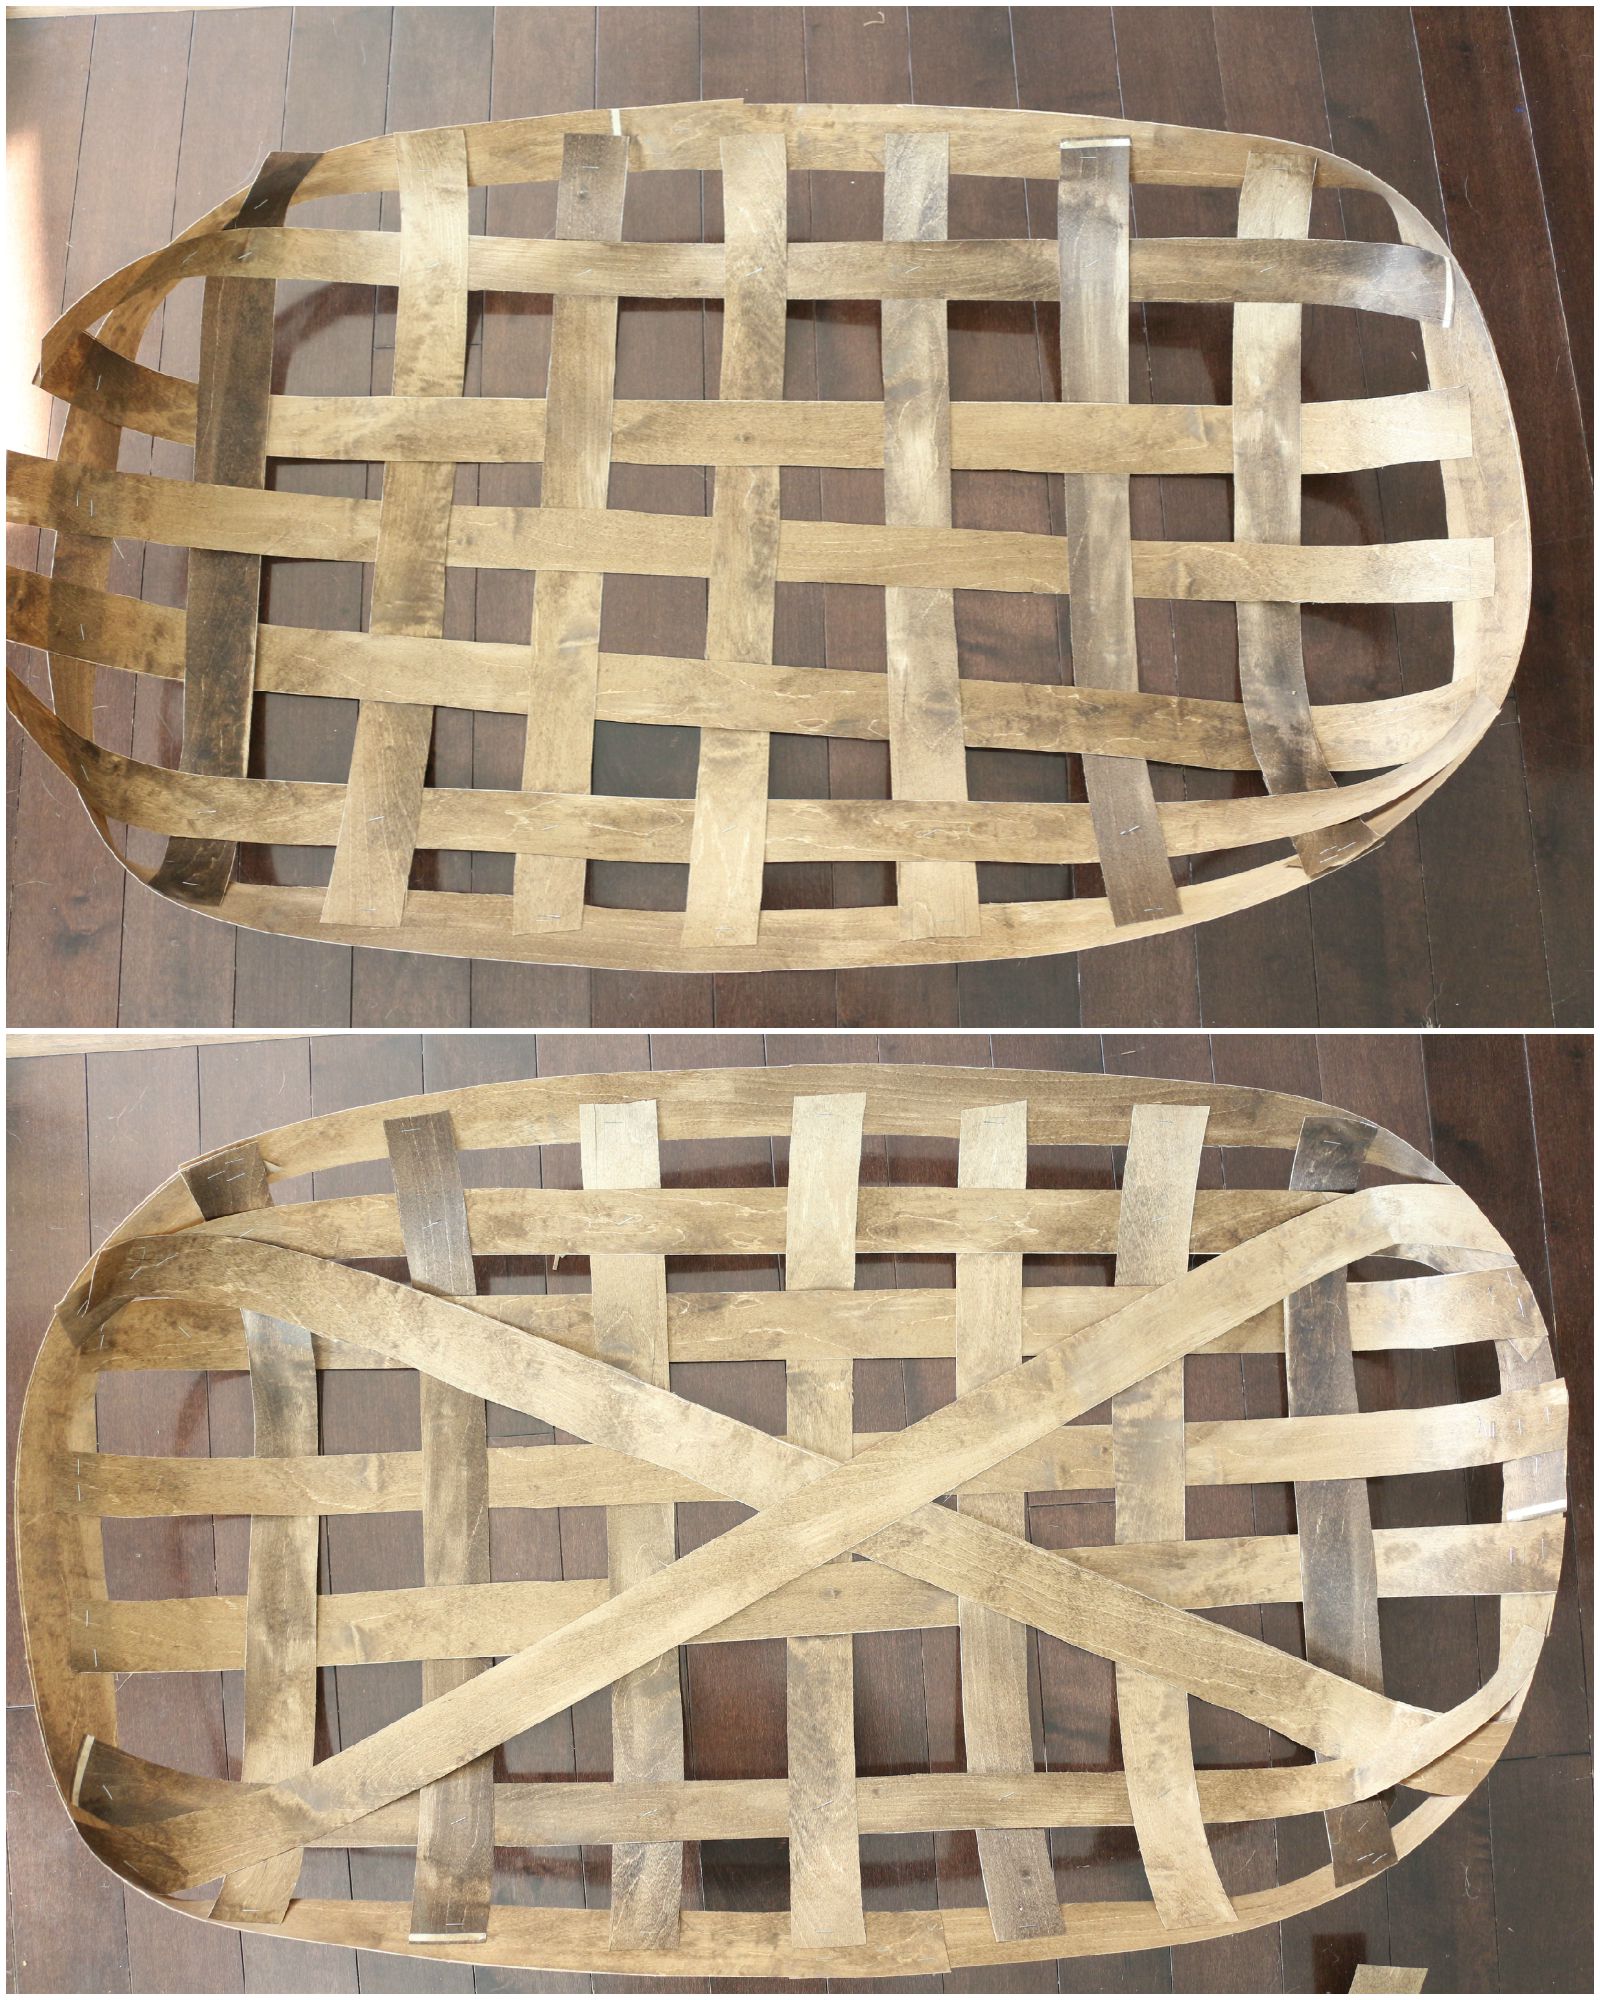
You may need to adjust the splints as you go along the basket, which is simple to do as the staples are easy enough to remove. If desired, staple two long splints across the bottom of the basket in an X.

I used hot glue to attach more strips on the outside and inside of the basket, both to hide the staples and add stability.

The beauty of this knock-off is that is doesn’t need to be perfect. In fact, if you look at true vintage tobacco baskets, they are usually unevenly weaved, often broken and look perfectly imperfect. In retrospect, I would have made two smaller baskets instead of a large one, but as it cost less than $20 in materials, I will probably make more.
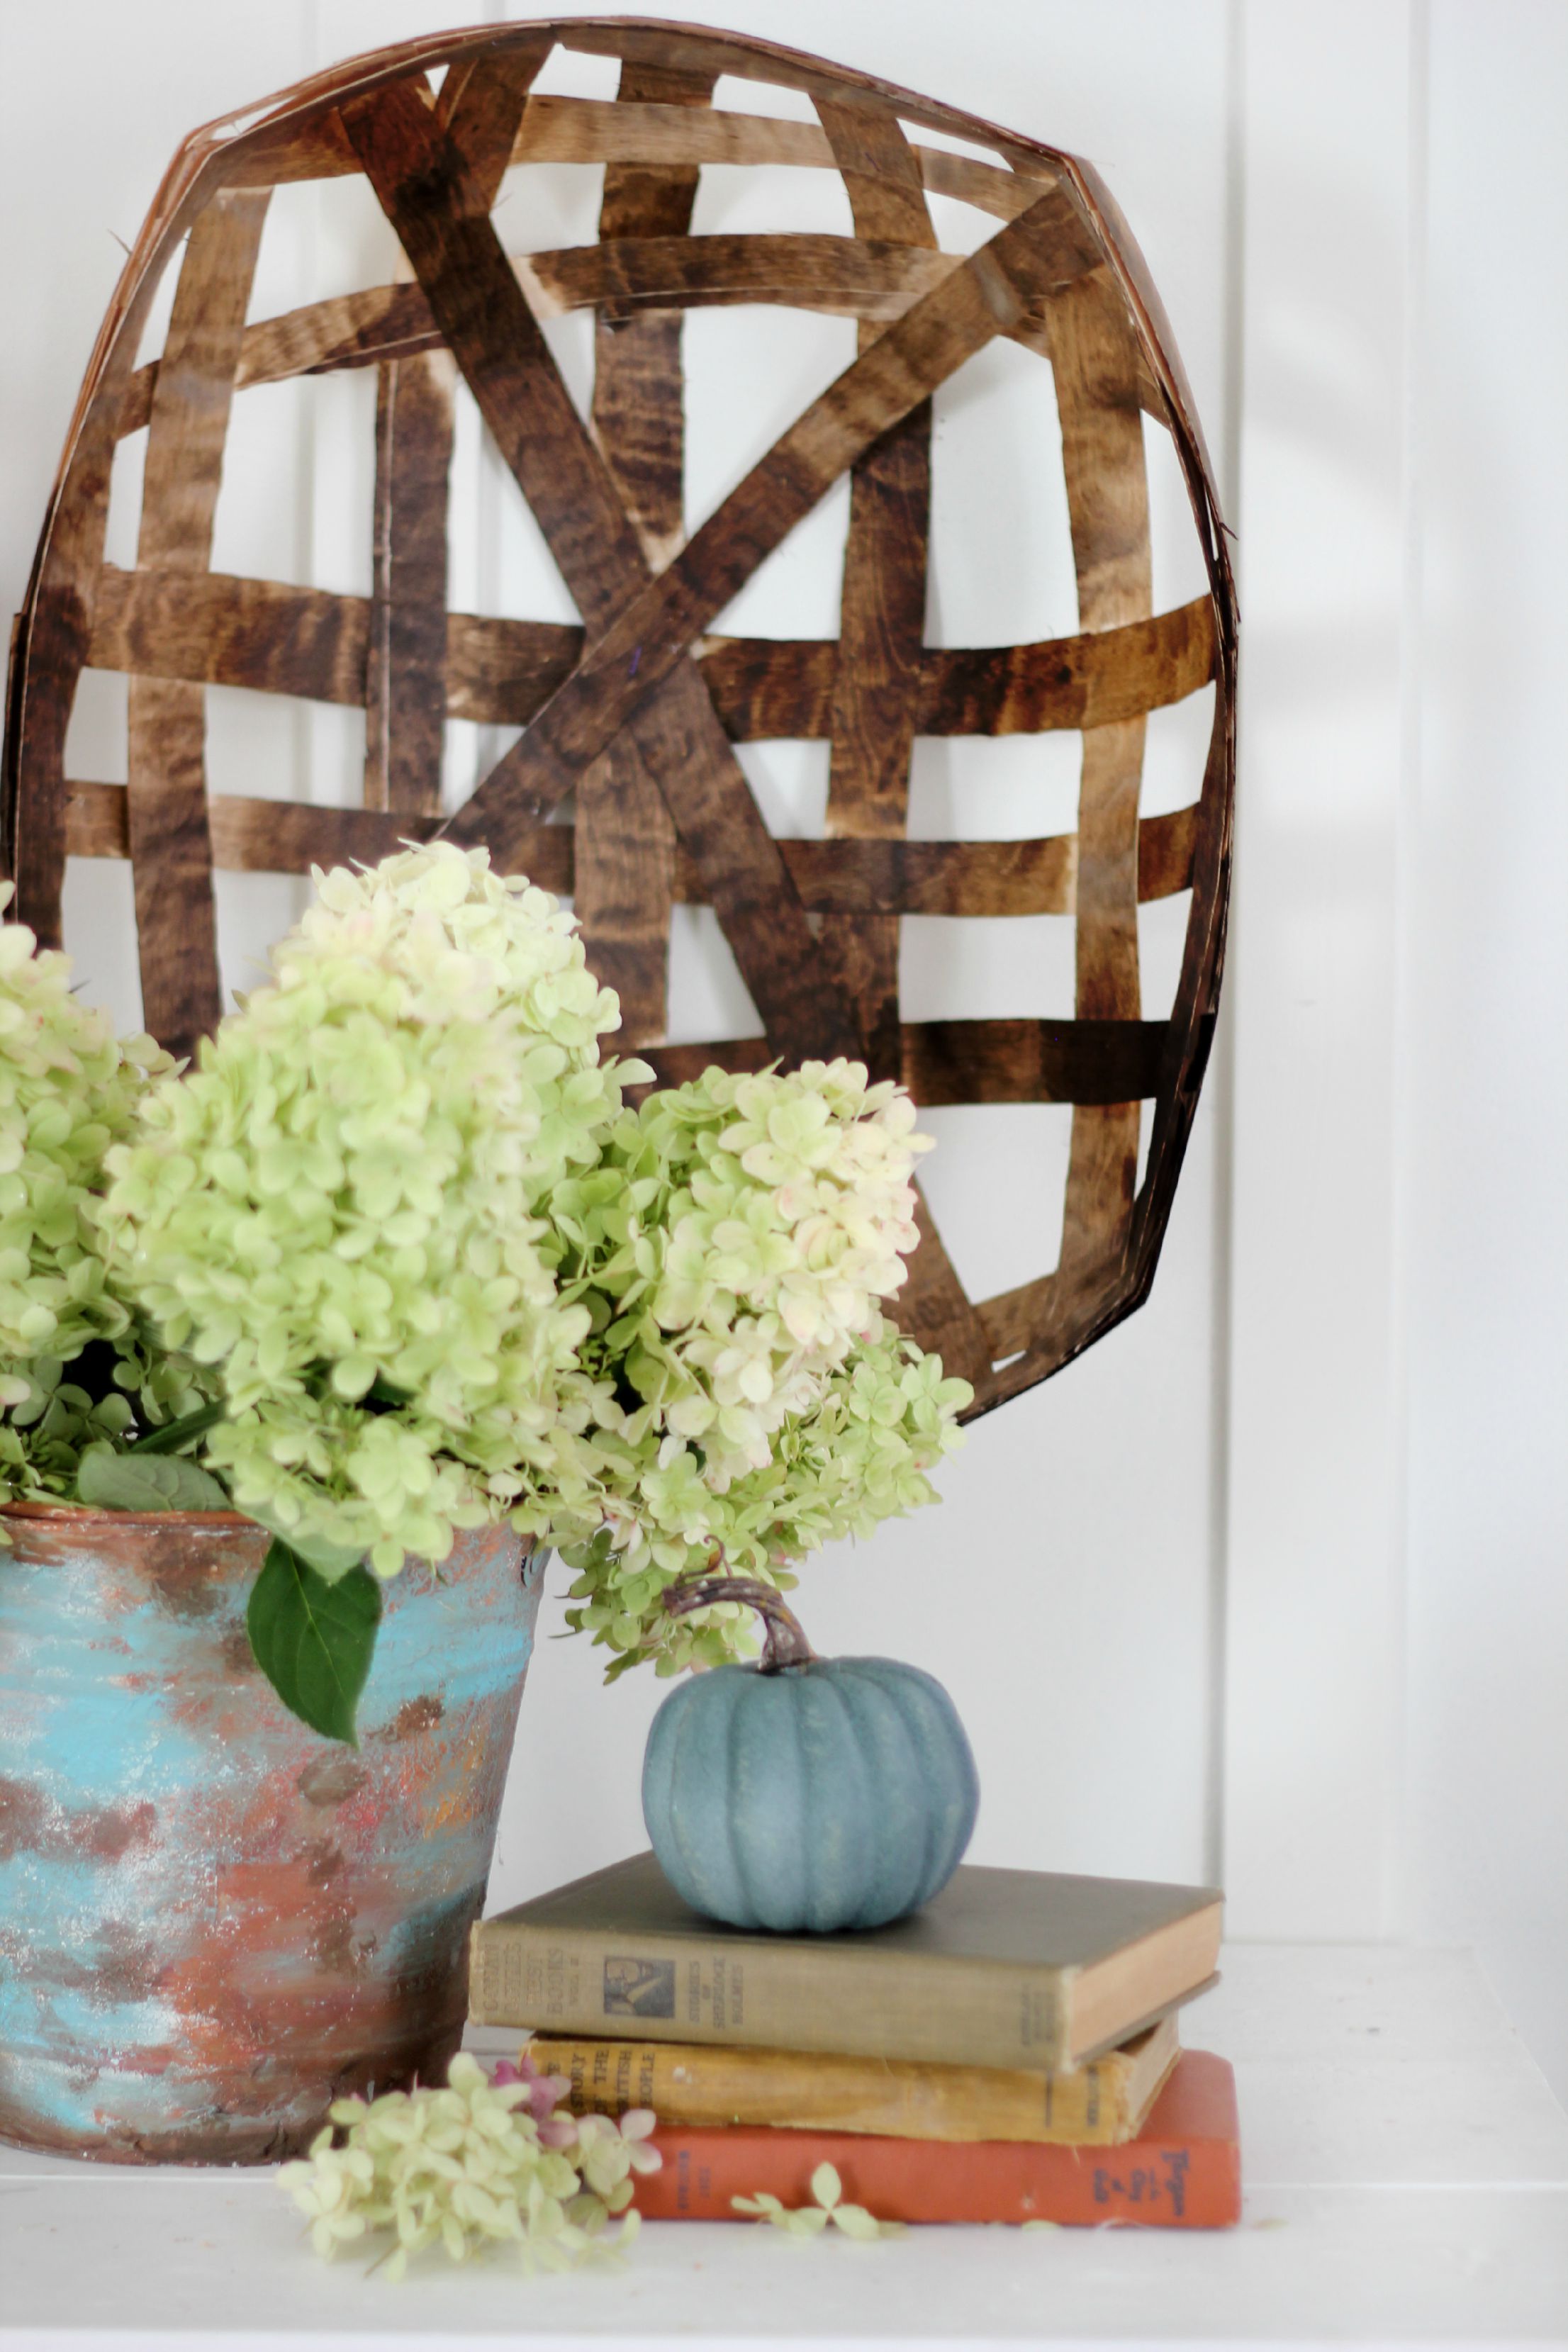
Here was my ‘prototype’. This one was smaller and I stained the wood after the fact, but I wanted to give you a sense for how it would look in a smaller scale with thinner splints. I think that whenever you see a DIY, it’s a lot more fun to make it your own and put your own spin.
Well, that’s it for now. I hope you enjoyed this little craft and you give it a go. I’d love to know if you try it.
If you have any questions, just let me know.
Thanks so much for dropping by and have a lovely day…xo
much love,


This is fabulous, thank you for a great diy! I’ve always wanted one of those baskets.
Wow! Love this creation! And it’s so inspiring! Never would have thought to do this in wood veneer – that is really thinking outside the box! Thanks so much for sharing. I’m trying to think of ways to tweak your wonderful idea and project!
Lucy, Lucy, Lucy,
Love this basket! So glad you have shown us this project and I must run right out to Home Depot and get the supplies. I am learning so much from you bloggers about DIY projects and it is so much fun than buying finished projects in a store! Love the aspect of making things – especially something from history although it is a knockoff! Keep up your inspiring work!
I can’t wait to make one of these! Thanks for sharing this great tutorial. Also, what paint color did you paint your little blue pumpkin? I LOVE it!
Gorgeous basket! I want to try making this!
Her Heartland Soul
http://herheartlandsoul.com
Thanks for sharing this diy. I’ve always wanted a tobacco basket but the price was high. You have encouraged me to give this a try.
I am going to try this!! Love it! I recently recreated a demijohn, cause they are so expensive…love these affordable ideas!
xo
Debbie
The imperfections is what make it perfect. Love the finish, you made it look so easy. I will have to try one soon. Mine will most likely look more wonky. 🙂
Great project! Looks wonderful on your beautiful coffee table!
Remarkable outcome and such ingenuity. Thank you for sharing, Ardith
Such a beautiful piece and seems like a fun DIY! Thanks so much for sharing! It looks so pretty styled the different ways!!
Hugs,
Becky
A little history about these baskets. My hubs and I grew up in Kentucky (the #1Burley Tobacco-producing state back in the day). His family raised Burley (a very labor-intensive crop-300 man hours with minimal mechanization to produce one acre of tobacco). It was then sold at the local tobacco warehouses after it was cut, hung by hand in the rafters of the barns to dry and then later hand-stripped and hand-tied. As years went by, instead of hand-tying, the tobacco was hand-packed (baled). The warehouses put the tobacco on these to sell and used forklifts to move them. The tobacco would then go to a redryer and then eventually processed. As they became worn/brittle, etc., the baskets were disposed of by the thousands.
Thanks for the tutorial! I’ve seen so many Tobacco baskets lately in fall inspiration photos, but have never found one for sale. Gorgeous!
Hi Lucy! Stopped by after seeing the link for this great tutorial at Prodigal Pieces FB page. I have to say this reminds me so much of something I’d see in VA or NC! I can’t wait to try this! Thank you so much for the tutorial—so clear that even I should be able to follow it!
I love your creation! Now I cannot wait to try one. Thank you so much for sharing.
Lucy, you are so clever and I think this is great!! I’m going to try to make one. All the stores are gong to wonder why we’re all suddenly buying wood veneer!
love and blessings~
Lynda @ Gates of Crystal
So awesome, Lucy! x
Lucy this is amazing! How very very creative!
I love this project ….. getting my supplies today.
One question:
How do you use the steel wool and vinegar solution to get the gray color? How do you make the solution?
Thanks mucho,
Linda :o)
Hi Linda…thank you so much for question. I don’t have exact measurements for that, but my friend Jennifer has a really great tutorial here >
http://cityfarmhouse.com/2013/08/rustic-glam-chair-makeover-easy-fix-for-those-dark-legs.html
Hello Linda, I’ve been making this stain for about 40 years. I just take a plain- no soap steel wool & place in a jar. I use a spaghetti sauce jar. Then I pour white vinegar in the jar. The more vinegar you use, the lighter the stain will be. Then let sit for a while. The Steel wool will rust. I like it just about disintegrated. You can strain with cheesecloth to get all the tiny bits out. It’s very easy. Then stain away
This is awesome! I use to weave baskets and did fine art shows with them for a number of years. I never thought of using veneer strips. I’ve been wanting one of these tobacco baskets for my gallery wall in our living room and thanks to you, I think I’ll finally have one to hang. Thanks for sharing.
I’ve never heard of a tobacco basket before. I was thinking it was like a gift basket but with cigarettes and matches, lighters, etc. Then I thought, that can’t be right so I gave it a look see. So that’s what a tobacco basket is! I know I could never do this but you did a really nice job on it. Good for you on doing your own DIY!
I have my wood ordered and am waiting for it to arrive ….. thinking about making 3 nesting tobacco baskets …. please send information on the vinegar solution, how to apply, and any particulars needed to age them to that nice gray color.
Thanks again, I can’t wait to get started …… and …… I read your blog every morning ;o)
Linda :o)
Do you mind sharing where you ordered your wood from? The only kind I can find at my local Home Depot has the glue on the back.
Thanks!
Francine
Sure …. I purchased the following from Amazon ….. Wood Veneer, Birch, White Rotary, 2 x 8, 10 mil Paper Backer
by Veneer Tech and Red Oak Wood Veneer Plain Sliced 10 mil 2×8 Sheet by Wood-All ….
The Birch stained better than the Red Oak ….
Linda :o)
I’m trying to order my products for this and now I’m concerned. If i use paper backed can you see the paper or does it stain and disappear?
Thank you!
It’ll stain somewhat …. it’ll also curl if you get it real wet ….. depending on how you will use the basket – inside to show or outside to show, place the paper on the side not showing …..
:o)
Lucy
This is really lovely, and a brilliant DIY.
I hope it’s easy to get some veneer here in rural Oz.
I shall start looking this weekend 🙂
<3
Pia
I am completely in love with this! I was at a specialty wood store the other day looking at overpriced veneers and wishing I could find what I need to make one! What a timely tutorial, and thanks for the supplies links!! I’m totally making one tomorrow!
K
I adore tobacco baskets and have them in my booth all the time. I love your version…my new favorite DIY! I may try this for my dinning table so I can have the perfect size to fit the table. Thanks a bunch!
Love tobacco baskets, but the chances of finding one here are pretty remote. I am going to give this a try. I may even be brave enough to post a pic!! LOL
Thanks for the link to the vinegar solution. I’ll try it on my next tobacco basket. I made a large tobacco basket …. took me awhile, and used a million staples, but finally got it constructed ….
Sold it the first day at a craft fair …. I’ll be making more!
After the learning curve with the initial basket, maybe I can cut down on staple usage :O)
Nice idea and wonderful results!! I like the idea of making one just a little smaller for a table top. The real ones are too large and too expensive. Thanks!!
I’m excited to make this! Can you tell me what brand veneer you used? The wood veneer we brought home from Home Depot had an adhesive back — not really usable for this project. Thank you so very much for the tutorial. Yours turned out gorgeous!
I ordered on-line from Amazon – one sheet of Red Oak Wood Veneer Plain Sliced 10 mil 2×8 Sheet
by Wood-All and one sheet from Wood Veneer, Birch, White Rotary, 2 x 8, 10 mil Paper Backer
by Veneer Tech …. haven’t used the Red Oak yet so I can’t tell you how it will react …. but the Birch curls as soon as it is wet.
Made one basket and it sold immediately at our town fair …. sure wish I had made more ….
Best of luck to you …. :o)
I’m just now noticing the link to the veneer at Home Depot. Eek! Thank you! And to you, Linda!
I really want to make the tobacco basket but I am having trouble finding veneer without adhesive. Most of what I’ve found says it’s paper backed. Does that mean it does or does not have adhesive on it?
I order veneer from Amazon all the time …. it is okay to get a veneer that is backed with papers stuff ….. just make sure it is not sticky ….. and when you make your tobacco basket, make sure you keep all “like side” together ….
This is fantastic! I’ve been wanting a tobacco basket for a long time but have held off on buying one since they are so pricey. I’m looking forward to giving this a try, thanks for sharing!
Love, love love your basket. Love even more that I can make any size. I was just looking at wood veneer on Amazon. Looks like it’s about $30 plus shipping for 1- 2×8. How many did you go through for the basket you posted?
I was thinking of making a big square basket, at least 36×36. Might cost me a pretty penny to make that big I’m thinking. Please help
http://www.hometalk.com/13650640/diy-tobacco-basket-at-a-fraction-of-the-cost
I just made my tobacco basket thanks to you! I love it!
In the finished basket, it appears to have short strips coming from the edges to the bottom of your basket. Is this my Senior eyes’ optical illusion or were these used for added stability? I absolutely LOVE this project – BRILLIANT DIY!
I was looking to buy a basket like this until I saw the price tag. Yikes! So glad I found your site.
Hi,I log on to your new stuff named “Twitter” on a regular basis.Your story-telling style is awesome, keep doing what you’re doing! And you can look our website about proxy server list.
So Smart!!! This is fantastic! Can’t wait to try!
Love this idea. Want to make this just not sure how to bend the wood. Thank you for your help. Can’t wait to make
What an amazing tutorial! I cant wait to try this!! Thanks so much!!
Can you tell me the sage color plant in the basket? Is it faux?
I absolutely love this Tobacco Basket DIY project! The step-by-step instructions are super helpful, and the photos really bring the project to life. I can’t wait to try making one for my own home decor. Thanks for sharing such a creative idea!
What a beautiful and creative DIY project for decorating with a tobacco basket! If you’re also working on other projects and need fast, reliable support, I highly recommend checking out fastbound customer service. They provide excellent support for managing your business operations, and they are always quick to resolve any issues. It’s great to know that no matter what you’re working on, you can rely on strong customer service to keep things running smoothly.